One of the first things I noticed when I bought a used car with leather seats was how quickly the interior could go from classy to cracked and grimy if it wasn’t cared for properly. A lot of car owners ask me, “What’s the best way to clean the leather interior of a car without ruining it?”—and it’s a fair question. Leather isn’t like cloth; it needs the right cleaning methods and products to stay soft, durable, and looking sharp.
I’ve seen everything from greasy fingerprints on the steering wheel to salt stains from winter boots and even faded patches from the sun, and trust me—if you don’t tackle these issues the right way, you can do more harm than good. Knowing how to clean car leather seats, dashboards, and trim not only keeps your ride looking sharp, but it also helps preserve its value and comfort for the long haul. Stick with me, and I’ll walk you through the exact steps and tricks I use to safely bring leather interiors back to life.

Image by best10
Why Keeping Your Leather Interior Clean Matters
Picture this: you’re cruising down a sun-baked highway in Arizona, and over time, that relentless UV exposure starts cracking your seats. Or maybe you’re in the humid Southeast, where spills turn into sticky messes that attract mold. Leather interiors in cars aren’t just fancy—they’re practical for US drivers dealing with everything from long road trips to urban stop-and-go traffic. But neglect them, and you’ll end up with faded, brittle surfaces that cost a fortune to replace.
Cleaning regularly prevents that buildup of dirt, oils from your skin, and everyday grime that seeps in. Why does it matter? Well, clean leather lasts longer, resists wear from seat belts rubbing or kids climbing in, and even improves resale value if you’re thinking about trading up.
I’ve seen friends regret skipping this step, ending up with seats that look 10 years older than the car itself. Plus, it’s a simple DIY task that gives you that “I got this” feeling, especially if you’re a beginner mechanic or just an everyday driver wanting to save on detailing fees.
In colder climates like the Midwest, salt from winter roads can eat away at leather if not cleaned off promptly. And for truck owners hauling gear or pet parents with furry passengers, regular upkeep keeps allergens at bay. Bottom line: treating your leather right means fewer headaches down the road.
Gathering the Right Supplies for the Job
Before you start scrubbing, let’s talk tools. I’ve learned the hard way that grabbing whatever’s under the sink can lead to disasters—like that time I used a household cleaner that left my old Chevy’s seats sticky and discolored. Stick to leather-friendly stuff to avoid stripping the natural oils.
You’ll need a vacuum with a soft brush attachment to suck up loose crumbs without scratching. A couple of microfiber cloths are essential—they’re gentle and absorbent. For the cleaner, go for a pH-balanced leather soap or a dedicated automotive leather cleaner; I’ve had great luck with ones that foam up lightly to lift dirt. Don’t forget a leather conditioner to restore moisture after cleaning.
If you’re on a budget, a mild soap diluted in water works in a pinch, but test it first. Add in a soft-bristle brush for crevices, especially in perforated seats common in luxury sedans like BMWs or Audis. For US-specific needs, consider UV-protectant conditioners if you’re in sunny states like California or Texas—these help combat fading from constant exposure.
Here’s a quick list of basics:
- Vacuum with attachments
- Microfiber cloths (at least 3-4)
- Leather cleaner (spray or wipe form)
- Leather conditioner
- Soft brush or old toothbrush
- Optional: Distilled water for rinsing
Pros of using dedicated products? They preserve the leather’s finish. Cons? They might cost a bit more upfront, but they save you from expensive repairs later.
Step-by-Step Guide to Basic Cleaning
Alright, let’s get our hands dirty—in a good way. I’ve cleaned dozens of interiors, from family minivans to sports cars, and this method works every time. Park in a shaded spot to avoid quick drying that could leave streaks, and roll down the windows for ventilation.
First, vacuum thoroughly. Start with the seats, using the brush attachment to gently loosen dirt from seams and perforations. Pay extra attention to areas under the seats where crumbs hide—I’ve found everything from lost fries to pet hair that way. This step prevents scratching during wiping.
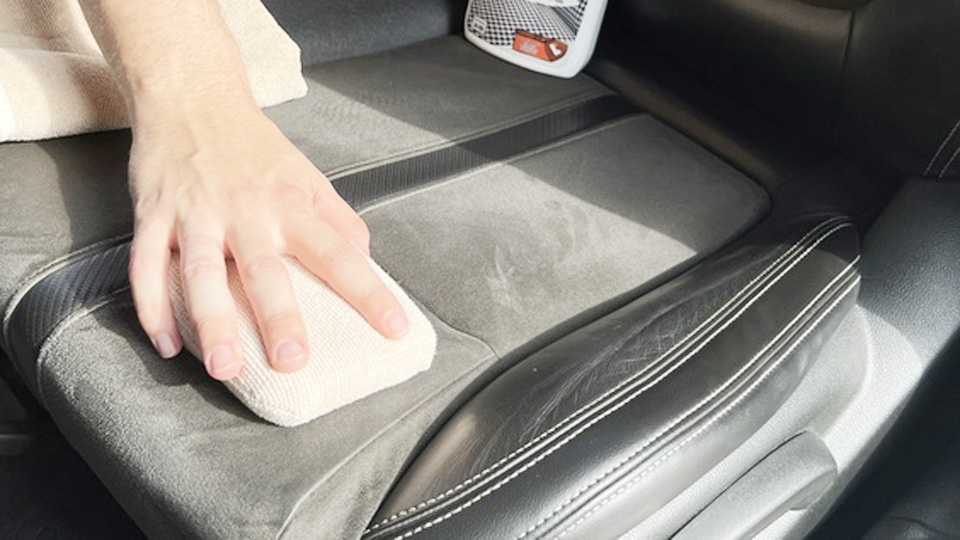
Next, apply your leather cleaner. Spray it lightly on a microfiber cloth, not directly on the seat, to control the amount. Work in small sections, like one seat at a time. Gently wipe in circular motions, letting the cleaner sit for a minute if there’s buildup. For everyday drivers, this removes sweat and oils that accumulate from long commutes.
Then, wipe away the residue with a clean, damp microfiber cloth. Use distilled water to avoid mineral spots, especially in hard-water areas like the Southwest. Dry immediately with another dry cloth to prevent water marks.
Finally, let it air dry completely before sitting—give it at least an hour. I’ve rushed this before and ended up with creaky seats from trapped moisture.
This process takes about 30-45 minutes per car and should be done every couple of months, more if you have kids or pets.
Handling Tough Stains on Leather Seats
Stains happen—coffee spills on a morning rush, ink from a pen in your pocket, or grease from fast-food runs. I’ve dealt with them all in my garage sessions. The key is acting fast, but if it’s set in, don’t panic.
For food or drink stains, blot immediately with a dry cloth to absorb excess. Then, use a leather cleaner mixed with a bit of warm water. Dab gently, don’t rub, to avoid spreading. In humid climates like Florida, dry quickly to prevent mold.
Ink marks? A bit of rubbing alcohol on a cotton swab works wonders, but test first—it can dry out leather if overused. I’ve saved a white leather interior in a friend’s SUV this way after a kid’s art session gone wrong.
For grease or oil, sprinkle baking soda to absorb, let sit overnight, then vacuum and clean as usual. Warning: Avoid heat sources like hairdryers on stains; they can set them permanently.
Pet hair and dander? A rubber glove wiped over the surface picks it up easily before vacuuming. In trucks like F-150s, where gear gets tossed around, this prevents embedded grime.
Always follow with conditioning to restore what the cleaning removed.
Conditioning Your Leather for Lasting Protection
Cleaning is only half the battle—conditioning is where the magic happens. Think of it like moisturizing your skin after a shower. I’ve seen unconditioned leather crack in dry Colorado winters, turning a comfy ride into a brittle mess.
Apply conditioner with a clean microfiber cloth, using a small amount to avoid greasiness. Work it in evenly, focusing on high-wear areas like the driver’s seat bolsters. Let it absorb for 10-15 minutes, then buff off excess.
Why does this matter? It replenishes oils, prevents cracking, and adds a subtle shine. For US roads with potholes and vibrations, conditioned leather holds up better against constant movement.
Do this after every clean, or quarterly. In sunny areas, choose one with UV blockers to fight fading—I’ve noticed a big difference in my own cars parked outside.
Pros: Keeps leather soft and supple. Cons: Overdo it, and seats feel slick for a day or two.
Maintenance Tips Tailored to US Driving Habits
Living in the US means diverse conditions—blazing Texas heat, rainy Pacific Northwest, or snowy New England salts. I’ve adapted my routines accordingly.
Vacuum weekly if you’re a daily driver; it catches dirt before it grinds in. Use seat covers during messy seasons, like mud from off-roading in Jeeps or sand from beach trips.
For climate specifics: In dry deserts, condition more often to combat cracking. Humid spots? Wipe down frequently to avoid mildew—I’ve added silica packs under seats for moisture control.
Car model tips: Sedans like Civics have tighter spaces, so use slim attachments. SUVs and trucks? Focus on door panels and consoles too, as they get more abuse from loading gear.
Pro tip: Keep a travel kit in your trunk—microfiber cloth, wipes, and mini vacuum—for quick touch-ups on road trips.
Here’s a comparison table for maintenance frequency:
| Driving Habit | Cleaning Frequency | Conditioning Frequency | Extra Tip |
|---|---|---|---|
| Daily commuter | Every 1-2 months | Quarterly | Wipe spills ASAP |
| Family with kids/pets | Monthly | Every 2 months | Use pet barriers |
| Off-road enthusiast | After each trip | Monthly | Remove mud promptly |
| Long-haul driver | Every 3 months | Quarterly | Add UV protectant |
This keeps your interior fresh without overdoing it.
Common Mistakes and How to Avoid Them
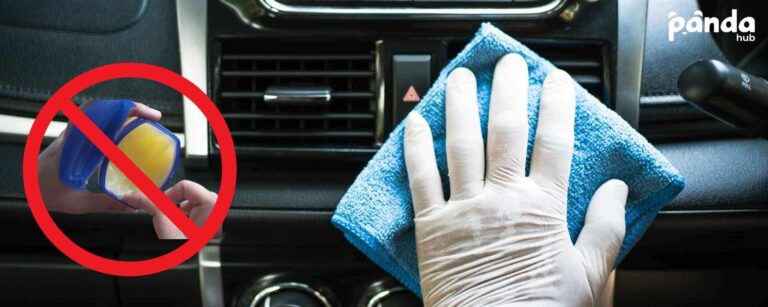
I’ve made plenty of blunders over the years, like using window cleaner on leather—big no-no, it strips the finish. Avoid household hacks unless tested; vinegar can work diluted but often leaves a smell and dries out surfaces.
Don’t oversaturate—water seeping into seams causes musty odors or mold, especially in enclosed garages. Warning: Never use abrasive sponges; they scratch, ruining the smooth feel.
Skipping the spot test? Rookie error. Always try products on a hidden area first.
In cold weather, warm up the car before cleaning to make leather more pliable—cold makes it brittle and prone to tears.
By steering clear of these, you’ll keep your leather looking pro-detailed.
Your Leather Deserves the Best
There you have it—everything you need to know about how to clean the leather interior of a car and keep it thriving. From vacuuming out those hidden crumbs to conditioning for that like-new suppleness, these steps have saved me time and money on my own vehicles. Remember, consistent care turns a chore into a habit that pays off in comfort and longevity. You’ve got this; grab your supplies and give your ride the TLC it craves.
After your first clean, take a before-and-after photo—you’ll be amazed at the transformation and motivated to stay on top of it.
Can I use household items to clean my leather car seats?
Sure, but sparingly. A mild soap mixed with water can handle light dirt, but avoid anything acidic like straight vinegar—it might damage the finish over time. Always follow with a conditioner.
How often should I clean my leather interior?
Aim for every 1-3 months, depending on use. If you drive a lot or have messy passengers, bump it up to monthly to prevent buildup.
What’s the best way to remove pet hair from leather seats?
A damp rubber glove wiped over the surface grabs hair easily. Follow with a vacuum, and condition afterward to keep the leather smooth.
Is it safe to clean perforated leather seats?
Yes, but gently. Use a soft brush and avoid soaking—focus on dabbing cleaner and drying thoroughly to prevent moisture trapping in the holes.
How do I protect leather from sun damage?
Park in shade when possible, and use a conditioner with UV protection. Tinted windows help too, especially in hot US regions.


