I can’t tell you how many times I’ve had drivers pull into my garage complaining about squeaky brakes or a pedal that just doesn’t feel right. Sometimes the issue is worn pads, other times it’s a deeper problem with the pedal adjustment itself. That’s why today I want to walk you through something a lot of car owners overlook: how to adjust brake pedal on your car? It might not sound like a big deal, but your brake pedal plays a huge role in both safety and performance.
If it’s too low, you risk delayed braking. Too high, and you’re straining your foot every time you drive. I’ve adjusted countless pedals over the years, and one mistake I often see is people ignoring small changes until they become costly repairs. Getting it right not only saves you money but also gives you the confidence that when you hit the brakes, your car will respond the way it should.

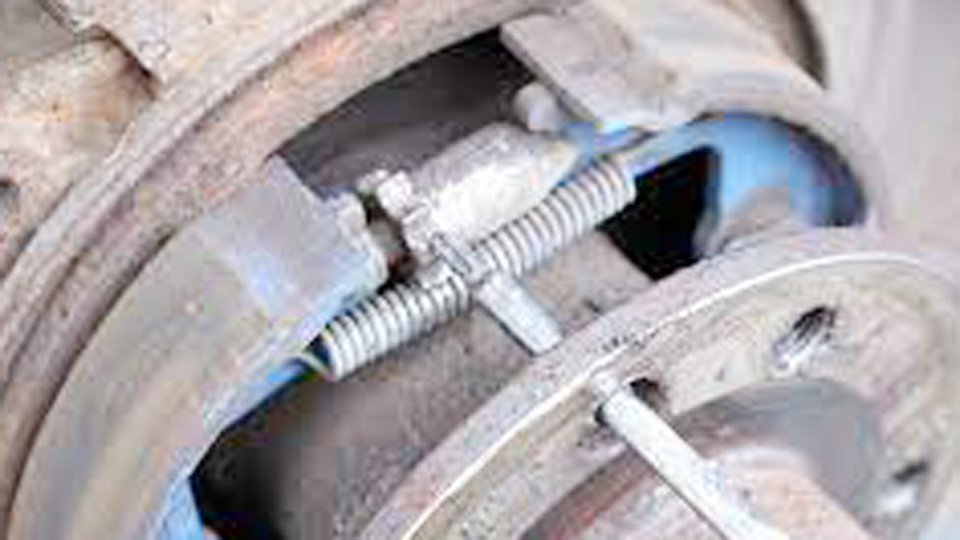
Image by eeuroparts
Brake Pedal System in Modern Cars
The brake pedal is that sturdy lever under your dash that you press to slow down or stop. It’s connected to the master cylinder via a pushrod or linkage, and in power brake systems, there’s a booster amplifying your foot pressure with vacuum or hydraulic assist. In my shop days, I’d explain to customers that it’s like the trigger on a gun—precise and responsive when set up correctly.
Common problems show up as the pedal feeling too soft, traveling too far to the floor, or sitting unevenly compared to the accelerator. I’ve pulled apart plenty of Chevy Silverados where dirt buildup or worn bushings caused this. Signs of failure include squeaks when pressing, inconsistent brake light activation, or even ABS warnings lighting up on the dash.
You might need to adjust or replace when the pedal height changes after brake work, like new pads or rotors. Why? Safety first—if it’s too low, you risk accidental presses; too high, and it’s uncomfortable for long drives. In older models like ’90s Jeeps, I’ve seen adjustments needed after off-road abuse shakes things loose.
When it comes to parts, OEM options from brands like Ford or GM are factory-spec, ensuring perfect fit for vehicles like the F-150 or Tahoe. Aftermarket from Dorman or ACDelco often cost 30-50% less but might need tweaks for compatibility. I’ve installed both; OEM feels premium, but aftermarket holds up fine in daily drivers.
Installation tips: Always chock wheels and disconnect the battery for safety. Common mistakes? Over-tightening the pushrod, which binds the pedal. In one anecdote, a buddy brought in his Toyota Camry after a DIY job—he’d skipped lubricating the pivot, leading to a sticky pedal that nearly caused a fender-bender.
Signs Your Brake Pedal Needs Adjustment or Repair
Picture this: You’re cruising down I-95, and your brake pedal sinks further than usual. That’s a red flag. Common signs include excessive free play (that initial slack before brakes grab), vibrations underfoot, or the pedal not returning fully. I’ve diagnosed this in countless Dodge Rams where worn return springs were the culprit.
Problems often stem from hydraulic issues, like low fluid pulling the pedal down, or mechanical wear in the linkage. In humid areas like Florida, corrosion can seize pivots, making adjustment a must.
Replacement or adjustment is needed when safety’s compromised—think if the brake lights don’t trigger promptly, risking rear-end collisions. Or for performance, like in tuned Mustangs where pedal feel affects track times.
OEM pedals and components from Chrysler or Honda run $50-200, precise but pricey. Aftermarket from Raybestos or Moog? Cheaper at $30-150, with good warranties, but check reviews for fit on your model year.
For adjustment, grab a flashlight and crawl under the dash. Loosen the locknut on the pushrod, turn to set height (aim for 3-5 inches from floor in most sedans), then retighten. Maintenance: Lube pivots yearly. Mistake I see often? Ignoring the brake light switch—adjust it too, or lights stay on, draining your battery. Once, I fixed a client’s Subaru Outback where a loose switch caused constant illumination; simple tweak, big relief.
Step-by-Step Guide: How to Adjust Brake Pedal Height on Your Car
Alright, let’s get greasy. First, park on level ground, engine off, and engage the parking brake. Tools you’ll need: adjustable wrench, pliers, flashlight, and maybe a ruler for measuring pedal height.
Step 1: Locate the brake pedal assembly under the dash. In most US cars like the Ford Explorer, it’s right behind the pedal arm.
Step 2: Identify the pushrod connecting to the master cylinder or booster. There’s usually a clevis or threaded end with a locknut.
Step 3: Measure current pedal height from the floor to the pedal pad top. Factory specs vary—check your owner’s manual; for a Chevy Malibu, it’s around 4 inches.
Step 4: Loosen the locknut with your wrench. Turn the pushrod clockwise to raise the pedal, counterclockwise to lower. Go in small increments—quarter turns.
Step 5: Test by pressing the pedal; it should have 1-2 inches of free play before resistance.
Step 6: Retighten the locknut, then check brake lights activate midway through travel.
Safety tip: Wear gloves to avoid pinches, and never adjust while driving. I’ve heard horror stories of folks trying quick fixes on the road—bad idea.
If adjustment doesn’t hold, you might need to replace the pushrod or pedal assembly. OEM from GM for a Silverado? About $100, bolts right in. Aftermarket from AutoZone’s house brand? $60, but verify threads match.
Pros of DIY: Saves $200 shop fee. Cons: If you’re new, you might misalign, affecting braking. In my experience with a ’15 Honda Accord, a slight over-adjustment made the brakes grabby—had to redo it.
Common Brake Pedal Problems and Fixes for Popular US Vehicles
In American trucks like the Ram 1500, spongy pedals often mean air in lines after pad changes. Bleed the system first before adjusting.
For sedans like the Toyota Corolla, worn pedal bushings cause side-to-side play. Signs: Clunking noises. Fix by replacing bushings—OEM Toyota parts are $20, last longer than generic.
Why replace? If ignored, it wears the master cylinder prematurely, costing $300+. Reliability dips in stop-and-go traffic.
OEM vs aftermarket: For Fords, Motorcraft OEM ensures ABS compatibility. Aftermarket like Centric? Affordable, but some report quicker wear in harsh winters.
Installation: Support the pedal with a block while swapping bushings to avoid strain. Maintenance: Inspect during oil changes. Anecdote: A customer with a Jeep Wrangler complained of low pedal after mudding; turned out to be clogged linkage—cleaned and adjusted, good as new.
OEM vs Aftermarket Brake Pedal Components: Which to Choose?
Let’s break this down with a comparison. I’ve swapped hundreds of these, so here’s real talk.
| Aspect | OEM (e.g., GM, Ford) | Aftermarket (e.g., Dorman, ACDelco) |
|---|---|---|
| Price | $80-250 | $40-150 |
| Fit & Compatibility | Perfect for specific models like Chevy Tahoe | Good, but may need shims in older Dodges |
| Durability | High, factory-tested for 100k+ miles | Variable; premium lines match OEM |
| Warranty | 1-2 years from dealer | Lifetime on some, like Moog |
| Availability | Dealerships or online like RockAuto | AutoZone, O’Reilly—same-day pickup |
Pros of OEM: Seamless integration, especially with electronic pedals in newer EVs like the Tesla Model 3 (though adjustment is limited). Cons: Costly, wait times.
Aftermarket pros: Budget-friendly, innovative materials sometimes outperform stock. Cons: Fakes abound—check holograms or serials to spot counterfeits.
In the US, brands like Bosch aftermarket are reliable for imports like BMWs. Tip: For genuineness, buy from authorized sellers; I’ve seen fake pedals fail early, like one on a client’s Nissan Altima that cracked under pressure.
Tools and Safety Tips for Brake Pedal Adjustment
You don’t need a full shop, but quality tools make it easier. Essentials: 10-14mm wrenches, needle-nose pliers for clips, and a multimeter to test switches.
Safety first: Disconnect battery to avoid airbag deployment—trust me, it’s a shock if it goes off. Work in a well-lit garage, not roadside.
Best practices: Double-check torque specs (usually 20-30 ft-lbs on locknuts). Maintenance: Wipe down assembly during adjustments to prevent grime buildup.
Common mistake: Forgetting to readjust after new brakes. In a workshop story, a young mechanic on a Volkswagen Jetta over-lowered the pedal, causing knee strain for the tall owner—lesson learned.
When to Replace the Brake Pedal Assembly Entirely
Adjustment isn’t always enough. If the pedal arm is bent—from a crash or heavy-footed driving—replace it. Signs: Visible damage, uneven wear.
Why? Safety— a warped pedal can fail under hard braking. Cost-wise, ignoring it leads to booster damage, upping bills.
OEM for a Honda Civic: $150, direct bolt-on. Aftermarket from Spectra: $100, but ensure it matches ABS sensors.
Installation: Remove dash panels, unbolt old assembly, transfer switches. Tips: Label wires. Anecdote: Fixed a bent pedal on a Ford Mustang after a minor wreck; new one restored that crisp feel, owner was thrilled.
Brake Light Switch Adjustment: Often Overlooked but Crucial
Tied to pedal height, the brake light switch sits on the arm. Misadjusted? Lights don’t work, or stay on.
What it does: Signals taillights and disengages cruise control.
Problems: Worn contacts cause intermittent failures. Signs: No brake lights—get pulled over quick.
Adjust by threading it in/out until it clicks at half-pedal travel. Replacement needed if faulty—OEM GM $20, aftermarket $10.
Pros of aftermarket: Cheap. Cons: Shorter life in dusty areas.
Tip: Test with a helper watching lights. In my experience, a loose switch on a Subaru Forester drained the battery overnight—simple fix, big save.
Electronic Brake Pedals in Modern Vehicles: Adjustments and Challenges
In cars like the Chevy Bolt or hybrids, pedals are electronic, with sensors instead of mechanical links. Adjustment is software-based, often needing a scan tool.
What they do: Send signals to the ECU for regenerative braking.
Problems: Sensor drift causes inconsistent feel. Signs: Dash errors.
Why adjust/replace? Efficiency—poor calibration wastes battery life.
OEM sensors from Bosch: $100+, precise. Aftermarket: Rare, stick to OEM for compatibility.
Installation: Plug-and-play, but recalibrate with OBD tool. Mistake: Skipping reset—brakes feel off. Anecdote: Tuned a client’s Prius pedal sensor; improved regen, boosted MPG.
Maintenance Best Practices for Long-Lasting Brake Pedal Performance
Keep it simple: Inspect quarterly for play or noise. Lube pivots with silicone spray—avoids rust in snowy states like Michigan.
Tools: Basic kit suffices. Safety: Always test drive post-adjustment in a safe area.
Identifying fakes: Genuine parts have OEM stamps; fakes lack detail. Buy from trusted US chains.
Pro tip: Pair adjustment with fluid flush every 2 years—prevents sponginess.
Conclusion
Wrapping this up, adjusting your brake pedal isn’t rocket science, but it demands attention to detail for safety and performance. From spotting signs like excessive travel to choosing between OEM reliability and aftermarket savings, you’re now equipped to handle it like a pro. Make smarter decisions by checking vehicle-specific specs and opting for quality parts— it’ll save you time and cash in the long run.
After any adjustment, take a short test drive and feel for smooth engagement; if it’s off, tweak again before hitting the highway. Stay safe out there, and keep those wheels turning.
Can You Adjust the Brake Pedal on Any Car Model?
Absolutely, but methods vary. On older mechanical systems like in a ’80s Chevy, it’s straightforward with a pushrod. Newer electronic ones, like in a Tesla, might require dealership tools. Always consult your manual for model-specific steps.
What Causes a Brake Pedal to Feel Spongy After Adjustment?
Often air in the lines or low fluid. Bleed the brakes thoroughly—start from the farthest wheel. If that doesn’t fix it, check for leaks in the master cylinder.
How Often Should I Check My Brake Pedal Height?
Every 6 months or after brake work. In high-mileage vehicles like delivery vans, monthly inspections catch issues early.
Is It Safe to Drive with a Misadjusted Brake Pedal?
No way— it compromises stopping distance. Get it fixed ASAP; I’ve seen minor misadjustments lead to close calls in traffic.
OEM or Aftermarket: Which is Better for Brake Pedal Parts?
Depends on your budget and use. OEM for precision in daily drivers; aftermarket for cost savings in older rides. Always prioritize fit over price.


