I’ve been elbow-deep in engines for over two decades now, from backyard fixes on my old Ford pickup to full shop overhauls on everything from Hondas to Chevys. One thing that comes up time and again in the garage is folks scratching their heads over how to release a timing belt tensioner without turning a simple job into a nightmare.
If you’re a DIY mechanic staring down a timing belt job, or just a car owner wanting to stay ahead of costly breakdowns, you’re in the right place. Let’s dive into this crucial component that keeps your engine’s heartbeat steady—because a failing tensioner can spell disaster for performance, safety, and your wallet.
Timing belt tensioners aren’t just another part; they’re the unsung heroes ensuring your camshaft and crankshaft sync up perfectly. Get this wrong, and you’re looking at bent valves, misfires, or worse—a seized engine on the highway. In my experience, nailing the release technique can save you hours and headaches, especially on interference engines common in US-market vehicles like the Toyota Camry or Ford Focus.

Image by nomaallim
What is a Timing Belt Tensioner and What Does It Do?
Your engine’s timing belt is like a rubber band looping around pulleys, keeping valves and pistons dancing in harmony. The tensioner? It’s the adjustable arm or hydraulic piston that presses against that belt, maintaining just the right amount of tightness. Without it, the belt could slip, flop around, or snap—leading to catastrophic engine failure.
In most setups, you’ll find either a manual tensioner (adjusted with a bolt) or a hydraulic one (self-adjusting via oil pressure). I’ve worked on plenty of Subarus where the hydraulic type shines for its low-maintenance vibe, but they can leak over time. This part matters for safety because a loose belt means skipped timing, which on an interference engine (think most modern four-cylinders) can cause pistons to smash into valves.
Performance-wise, proper tension ensures optimal fuel efficiency and power delivery—no more sluggish acceleration or rough idles. Cost? Ignoring it could run you $1,000+ in repairs, versus $50-150 for a new tensioner.
From a reliability standpoint, these tensioners prevent premature belt wear, which boosts your vehicle’s longevity. Fuel efficiency takes a hit with improper tension too—I’ve seen MPG drop by 2-3 points on a Chevy Malibu due to a wobbly tensioner causing belt slippage.
Signs Your Timing Belt Tensioner is Failing
Listen up, because catching a bad tensioner early can save your engine. The most common red flag? Weird noises from the engine bay. We’re talking rattling, squealing, or ticking sounds, especially at higher RPMs or during startup. I remember this one Honda Civic I fixed last summer—the owner brought it in with what sounded like a can of marbles shaking under the hood. Turned out the hydraulic tensioner was leaking, causing the belt to slap around.
Other symptoms include engine misfires or stumbling acceleration. If the belt isn’t taut, timing slips, and your cylinders fire out of sync. You might notice sluggish performance, like the car hesitating when you punch the gas. A check engine light could pop on too, often with codes related to cam or crank sensors. In severe cases, the engine won’t start at all, or you’ll get that dreaded battery light flashing as RPMs dip low.
Visually, check for belt wear like fraying or glazing, or oil leaks around the tensioner—that’s a sure sign of failure in hydraulic models. On a Ford Escape I worked on, the tensioner arm was wobbling side to side, a classic indicator of bearing wear. Don’t ignore these; a failed tensioner can lead to total belt breakage, and on US roads, that means getting stranded or worse.
When and Why You Need to Replace Your Timing Belt Tensioner
Timing is everything—pun intended. Most manufacturers recommend replacing the tensioner alongside the belt every 60,000 to 100,000 miles, depending on your vehicle. For instance, Toyota suggests 90,000 miles for models like the Corolla, while Ford might push it to 100,000 on the F-150’s overhead cam engines. Why? Because tensioners wear out from constant pressure and heat, leading to weakened springs or leaky hydraulics.
You need replacement if you spot those failure signs, or during routine maintenance to avoid risks. Safety is key here—a snapped belt at highway speeds could cause loss of power steering or brakes in some setups. Performance dips with poor tension, costing you in fuel and reliability. Cost-wise, doing it preventively is smart; a full timing belt kit (belt, tensioner, idlers) runs $200-500 in the US, versus thousands for engine rebuilds.
In my shop days, I’d always advise customers on high-mileage vehicles like Chevy Impalas to swap the tensioner proactively. One guy ignored it, and his engine grenaded—lesson learned the hard way.
OEM vs Aftermarket Timing Belt Tensioners: Which Should You Choose?
Ah, the age-old debate: Stick with original equipment manufacturer (OEM) parts or go aftermarket for savings? I’ve installed both in countless vehicles, and here’s the scoop. OEM tensioners, like those from Honda or Ford, are built to exact specs, ensuring perfect fit and longevity. They’re pricier—expect $100-200—but come with warranties matching your car’s.
Aftermarket options from brands like Gates, Dayco, or ACDelco can be half the cost, around $50-100, and often match or exceed OEM quality. Gates, for example, supplies many OEM belts anyway. But beware of cheap knockoffs; they might fail prematurely.
Let’s break it down in a table for easy comparison:
| Aspect | OEM Tensioners | Aftermarket Tensioners (e.g., Gates, Dayco) |
|---|---|---|
| Price (US Avg.) | $100-200 | $50-100 |
| Fit & Compatibility | Perfect for specific models | Good, but check vehicle fitment |
| Durability | High, factory-tested | Varies; premium brands like Continental are excellent |
| Warranty | Often 1-2 years or matches vehicle | 1 year typical, some lifetime |
| Availability | Dealerships, online (e.g., RockAuto for OEM equivalents) | Widely available at AutoZone, O’Reilly |
Pros of OEM: Reliability in critical engines, peace of mind. Cons: Higher cost, slower shipping sometimes.
Pros of aftermarket: Affordable, readily available in the US (think Amazon or NAPA), often upgraded materials. Cons: Quality varies—stick to trusted brands like Aisin for Asian imports or ACDelco for GM vehicles.
In my experience, for a daily driver like a Toyota Tacoma, aftermarket Gates works fine. But on a performance build? I’d lean OEM to avoid risks.
How to Release a Timing Belt Tensioner: Step-by-Step Guide
Alright, let’s get hands-on—this is where the rubber meets the road. Releasing the tensioner is key to any timing belt job, and doing it wrong can strip bolts or damage components. I’ve done this on everything from Subarus to Volvos, and the process is similar across most interference engines.
First, safety: Park on level ground, disconnect the battery, and wear gloves/eye protection. Engine off, obviously.
Step 1: Access the timing belt cover. Remove any obstructing parts like the serpentine belt (use a wrench on the tensioner pulley to slack it) or engine mounts if needed.
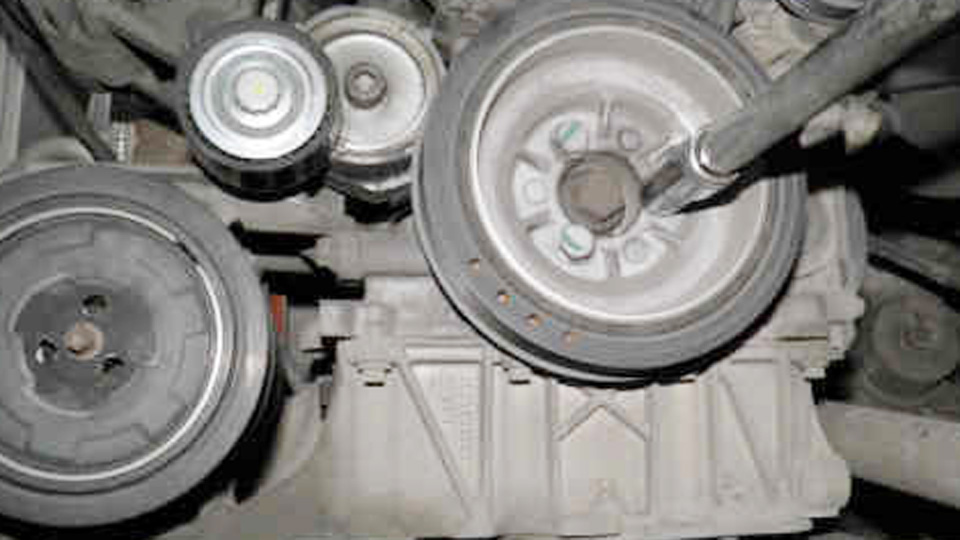
Step 2: Locate the tensioner—usually a pulley arm near the belt’s path. For manual types, loosen the mounting bolt (often 17mm) then the adjustment bolt (13mm) to slack the belt.
Step 3: For hydraulic tensioners, insert a pin or allen key into the hole to lock it compressed. Use a pry bar or special tool to push the arm counterclockwise, relieving tension. On a Honda, I once used a C-clamp to slowly compress it—works like a charm.
Step 4: Slip the belt off the pulleys carefully, starting from the slack side. Don’t force it.
Step 5: If replacing, remove the old tensioner bolts and install the new one. Reset hydraulic ones by compressing in a vise (gently!) and pinning.
Reinstall by routing the belt properly, then release the pin or tighten the adjustment. Turn the crank two full rotations by hand to check alignment—marks on cam/crank should line up.
Pro tip: On US models like the Chevy Cruze, double-check torque specs (around 30-40 ft-lbs for bolts) to avoid over-tightening.
Tools You’ll Need for the Job
Don’t skimp here—right tools make the difference. Basics: Socket set (metric, 10-19mm), wrenches, torque wrench. Specialized: Tensioner release tool (like Schley for VW/Audi) or a serpentine belt tool for leverage. A C-clamp for hydraulic compression, pin set for locking. For US availability, grab a Gates or Lisle kit from AutoZone—around $20-50. Safety gear: Gloves, flashlight. I’ve used a pry bar in a pinch, but dedicated tools prevent slips.
Common Mistakes When Working on Timing Belt Tensioners and How to Avoid Them
I’ve seen it all—rookies and pros alike botch this. Top mistake: Not aligning timing marks before releasing tension. Skip this, and your engine’s out of sync, leading to bent valves. Always mark or use locking tools.
Another: Over-tightening bolts. Stripped threads mean a headache; use a torque wrench every time. Forgetting to replace idlers or the water pump—common on jobs like a Subaru Forester. The pump’s right there; swap it to avoid double labor.
Misrouting the belt: It has to go over pulleys in the correct order, or it’ll slip. I once helped a buddy on his Ford Ranger who routed it backward—engine wouldn’t turn over smoothly.
Hydraulic woes: Compressing too aggressively cracks the housing. Go slow with a vise. And never reuse an old tensioner if it’s leaky; that’s asking for failure miles down the road.
Anecdote: Back in ’15, a customer with a Toyota RAV4 came in after a DIY job. He’d forgotten to pin the tensioner, and it sprang back, pinching his finger. Lesson: Follow steps religiously.
Best Brands for Timing Belt Tensioners in the US Market
Shopping in the States? Stick to proven names. Gates leads for versatility— their PowerGrip tensioners fit Fords to Toyotas, around $60-80. Dayco’s solid for domestics like Chevy, with hydraulic models that rival OEM. ACDelco shines for GM vehicles, offering lifetime warranties on some.
For imports, Aisin (often OEM for Toyota) is reliable, available at RockAuto for $50+. Continental’s premium for European rides. Avoid no-name Amazon specials; they fail fast.
Compatibility: Check your VIN— a Gates T41309 works on many Subarus. Prices fluctuate, but expect 20-30% savings online vs dealerships.
Tips for Identifying Genuine vs Fake Timing Belt Tensioners
Counterfeits flood the market, especially online. Genuine parts have holograms, serial numbers, or laser-etched branding—Gates has a QR code for verification. Packaging: OEM comes in branded boxes with seals; fakes have poor printing.
Feel the weight—real tensioners are hefty with smooth bearings. Spin the pulley; it should rotate freely without grit. Buy from trusted US retailers like NAPA or O’Reilly to avoid duds. I’ve spotted fakes on eBay that leaked oil within weeks—stick to authorized sellers.
Maintenance Best Practices and Safety Tips
Keep it simple: Inspect every oil change—look for leaks, noise, or wobble. Replace with the belt interval. Avoid oil/coolant exposure; it degrades rubber.
Safety: Block wheels, support the engine if jacking. Use eye protection—belts snap hard. Tools clean? Prevents contamination.
Anecdote: On a Chevy Tahoe, regular checks caught a failing tensioner early, saving the owner from a tow.
Conclusion: Keeping Your Engine in Sync for the Long Haul
Wrapping this up, the timing belt tensioner is your engine’s guardian of rhythm—ignore it, and you’re courting trouble. By understanding its role, spotting issues early, and choosing quality parts like Gates or OEM, you’ll boost safety, performance, and savings. Make smarter decisions: Always replace proactively, use trusted brands, and follow torque specs. Final pro tip: After installation, run the engine and listen—no noise means you nailed it. Stay safe out there, and happy wrenching!
FAQ
What are the symptoms of a bad timing belt tensioner?
Rattling or squealing noises, misfires, sluggish acceleration, or a check engine light. Inspect visually for leaks or wobble—catch it early to avoid engine damage.
How often should I replace my timing belt and tensioner?
Every 60,000-100,000 miles, per your manual. For US vehicles like Hondas, aim for 90,000 to prevent failures.
Is it okay to use aftermarket timing belt tensioners?
Yes, if from reputable brands like Dayco or Gates—they’re often OEM-equivalent and cheaper, but verify fitment.
What tools do I need to replace a timing belt tensioner?
Socket set, torque wrench, tensioner pin or C-clamp, and a pry bar. Specialized kits from Lisle help for tricky hydraulics.
How can I tell if my timing belt tensioner is genuine?
Check for branding, holograms, and smooth operation. Buy from authorized US stores to dodge counterfeits.


