Overspray happens more often than most drivers think—maybe you parked too close to a construction site, tried a DIY paint job, or even got caught near someone else’s project. Suddenly, your car’s clear coat feels rough to the touch and looks hazy. I’ve had plenty of cars come into my garage with this exact problem, and the first thing people ask me is: “How to Remove Overspray Without Damaging Clear Coat?”
The good news is, it can be done safely if you use the right techniques. The clear coat is delicate—it’s what gives your paint that glossy finish and protects the color underneath. Go too aggressive, and you’ll cut right through it.
Go too light, and the overspray stays put. I’ve found a few reliable methods, from using clay bars and detailing sprays to polishing compounds and, in tougher cases, specialized solvents. The trick is matching the method to the severity of the overspray.
In this guide, I’ll walk you through step-by-step how to carefully remove overspray while keeping your clear coat intact, along with a few pro tips to help prevent damage and restore that smooth, showroom shine.
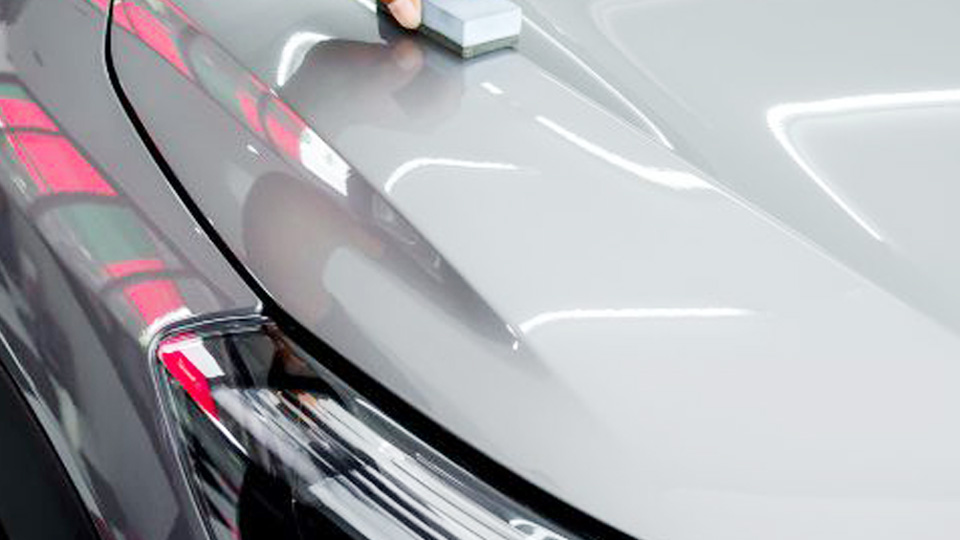
Image by eaglenationalsupply
What Is Overspray and How Does It End Up on Your Car?
Overspray is basically those tiny droplets of paint, clear coat, or even industrial coatings that land where they shouldn’t—like on your car’s exterior. It’s not a spare part per se, but think of it as an unwanted “add-on” that bonds to your paint surface. In my experience, it often comes from nearby spray painting jobs: maybe a construction site spraying railings, or a buddy in the driveway touching up their bumper without proper masking.
Common types include latex house paint (water-based, easier to remove), automotive enamel (oil-based, stickier), or clear coat mist from a body shop. What it does is create a rough, bumpy texture on your otherwise smooth finish, trapping dirt and making washing a nightmare. I’ve seen overspray from as far as 50 feet away on windy days—it’s sneaky like that.
Common problems? If left alone, it can etch into the clear coat over time, especially under hot sun, leading to permanent marks. Signs of failure aren’t always obvious at first; it might feel like fine sandpaper when you run your hand over the hood. Why replacement—or in this case, removal—is needed? To restore that factory gloss and prevent further degradation. Ignoring it could lead to oxidation, where the clear coat breaks down, exposing the base paint to elements.
When it comes to options, you don’t “replace” overspray, but you do choose removal tools like clay bars. OEM equivalents might be dealership-branded kits from Ford or GM, but aftermarket ones from brands like Meguiar’s or Chemical Guys are more accessible and often better value. I’ve used both; OEM stuff feels premium but costs more for the logo.
Installation—er, application—tips: Always work in the shade to avoid streaks. Maintenance involves regular waxing post-removal to seal the surface. Common mistake? Rushing in without testing a small spot first—I’ve learned that the hard way on a client’s Mustang, ending up with faint swirls I had to buff out.
Understanding Your Car’s Clear Coat and Why It’s Important
Your clear coat is that top layer of transparent polyurethane or acrylic on modern cars, applied over the colored base paint during manufacturing. It’s what gives your ride that deep, wet-look shine straight from the showroom. Without it, paint would fade fast from sun exposure, and scratches would show up easier.
Why does it matter? Safety: An intact clear coat prevents rust by blocking moisture. Performance: Smooth surfaces reduce wind resistance, aiding fuel efficiency—I’ve noticed a slight mpg bump on detailed vehicles during test drives. Cost: Repairing damaged clear coat can run $200–$800 per panel, versus $20 for DIY removal tools. Reliability: It extends paint life by 5–10 years with proper care.
Common issues: Peeling from age, yellowing from UV, or etching from contaminants like overspray. Signs of failure include dullness, haze, or cracking. Replacement? If overspray removal goes wrong, you might need a clear coat respray, which I’ve done on older Chevys—pricey at $300+ per job.
OEM clear coats are factory-spec, like those from PPG or BASF used by US manufacturers. Aftermarket? Touch-up kits from Dupli-Color or SEM, great for DIY but less durable. Pros of OEM: Perfect match, long-lasting. Cons: Hard to source without a shop. Aftermarket pros: Affordable, easy to find at AutoZone. Cons: May not bond as well.
From my garage days, I’ve compared them on side-by-side panels—OEM holds up better in harsh winters, but aftermarket saves bucks for budget builds.
Spotting Overspray: Signs and Common Causes
Run your hand over the paint—if it feels gritty or speckled, that’s overspray. Visually, look for tiny dots that don’t match your car’s color, often on horizontal surfaces like the hood or roof.
Common causes: Proximity to painting projects, like graffiti removal gone wrong or booth overspill at auto shops. I’ve had customers bring in vehicles after parking near highway overpasses during maintenance—those yellow line paints are brutal.
Why act fast? Fresh overspray is softer and easier to lift. Delay, and heat bakes it in, requiring more aggressive methods that risk the clear coat.
When Should You Remove Overspray? Timing Is Key
Remove it ASAP, ideally within days of noticing. Why? Bonded overspray hardens, making safe removal tougher. If your car’s headed for sale or a show, do it immediately for that pristine look.
In my shop, I advise clients to tackle it before winter, as salt and ice can embed it deeper. If it’s minor, maintenance waxing might suffice temporarily, but full removal prevents long-term damage.
Choosing the Right Tools: Clay Bars and Beyond
Clay bars are my go-to “spare part” for overspray—they’re synthetic or natural resin blocks that grab contaminants without abrading the paint.
What it does: Glides over the surface with lubricant, pulling off embedded particles like overspray, tar, or rail dust.
Common problems: Worn-out clay drops contaminants back on, causing scratches. Signs: It turns dark or crumbles.
Replacement needed when it’s too dirty—toss after 5–10 uses on average vehicles.
OEM vs aftermarket: OEM might be bundled in dealership detailing kits (e.g., Toyota’s own), but aftermarket dominates with brands like Meguiar’s (fine grade for light overspray) or Chemical Guys (medium for heavier stuff).
Here’s a quick comparison table:
| Brand/Product | Type | Price Range (USD) | Pros | Cons | Vehicle Compatibility |
|---|---|---|---|---|---|
| Meguiar’s Smooth Surface Clay Kit | Fine grade | $15–25 | Gentle on clear coat, includes lubricant, widely available at Walmart | Less aggressive for thick overspray | All US models, great for daily drivers like Honda Civics |
| Chemical Guys Medium Clay Bar | Medium grade | $10–20 | Excellent for stubborn overspray, flexible, good value | Can mar if overused without lube | Trucks like Ford F-150, handles industrial contaminants well |
| Mothers California Gold Clay Bar | Standard | $18–30 | Restores shine post-use, durable | Pricier, needs separate lube | Luxury cars like BMWs, avoids swirl marks |
| Griot’s Garage Paint Cleaning Clay | Premium | $20–35 | Long-lasting, ergonomic | Higher cost, not as common in stores | Performance vehicles like Mustangs, fine for sensitive paints |
| Adam’s Detailing Clay Bar | Fine/Medium | $15–25 | Soft, easy to knead, US-made | May require more passes | SUVs like Jeep Wranglers, versatile for off-road grime |
Pros of aftermarket: Cheaper, innovative formulas, easy online from Amazon or O’Reilly Auto Parts. Cons: Quality varies—stick to US brands to avoid imports that crumble fast.
OEM pros: Matched to your car’s paint system. Cons: Expensive, limited availability.
Installation tips: Knead the clay flat, use plenty of lube (like soapy water or dedicated spray). Maintenance: Store in a sealed container to prevent drying. Common mistake: Skipping the wash—dirt under clay causes scratches.
Personal insight: On a ’67 Chevy restoration, I used Mothers clay to lift old booth overspray—saved hours versus sanding.
Step-by-Step Guide to Safely Removing Overspray
Preparation
Start by washing your car thoroughly with a pH-neutral shampoo like Meguiar’s Gold Class. I always do this in my driveway with a two-bucket method to avoid swirls—one for soapy water, one for rinsing the mitt.
Dry with a microfiber towel, then inspect under good light. Park in shade; direct sun dries lube too fast.
Gather tools: Clay bar, clay lubricant (or diluted car wash soap), microfiber cloths, optional plastic razor for thick spots, and a polish/wax for aftercare.
Safety first: Wear gloves to protect skin from chemicals, and eye protection if using solvents. Work in a ventilated area.
Using a Clay Bar
- Spray lubricant liberally on a 2×2 foot section.
- Flatten a golf-ball sized piece of clay and glide it gently over the area in straight lines—no circles, as that can create holograms.
- Feel the grab; if it sticks, add more lube. Knead and refold as it picks up grime.
- Wipe the area with a clean microfiber to remove residue.
- Repeat across the vehicle, checking progress by feel.
For stubborn overspray, I sometimes warm the clay in my hands for better pliability.
This method’s safe because clay shears contaminants without digging into the clear coat—I’ve used it on hundreds of cars without issues.
Alternative Methods if Clay Doesn’t Cut It
For light overspray, try rubbing alcohol (70% isopropyl) on a soft cloth—dab and wipe gently. Test on a hidden spot first; too strong and it can haze the clear coat.
Denatured alcohol works for oil-based specks, but rinse immediately.
Wet sanding with 2000-grit paper is last resort for baked-on stuff—lubricate heavily and follow with compound. I’ve done this on salvage yard finds, but it’s risky for novices.
Plastic razor blades scrape without scratching—great for glass too.
Pros of solvents: Quick for small areas. Cons: Can dissolve clear coat if over-applied.
Common Mistakes I’ve Seen (and Made) in the Garage
Biggest one: Not using enough lubricant—dry clay acts like sandpaper, leaving marring that needs polishing out. I’ve fixed that on a buddy’s truck after he tried it dry.
Another: Pressing too hard. Let the clay do the work; force causes micro-scratches.
Skipping the pre-wash—loose dirt gets ground in.
Using household cleaners like WD-40—sure, it removes overspray, but residues attract more grime and can yellow paint over time.
Not polishing after: Removal exposes bare clear coat; wax seals it. I once forgot on a quick job, and the car dulled in a week.
From shop experience, customers often come in after botched DIYs—aggressive scrubbing with steel wool ruins finishes.
Tips for Identifying Genuine vs Fake Detailing Products
In the US market, fakes flood online—I’ve gotten burned on cheap Amazon clay bars that fell apart.
Check packaging: Genuine Meguiar’s has holograms or QR codes; fakes have blurry labels or wrong fonts.
Weight and feel: Real clay is dense and pliable; counterfeits are lightweight or brittle.
Smell: Authentic products have a mild, clean scent; fakes might reek of chemicals.
Buy from trusted spots: AutoZone, Advance Auto, or direct from brands’ sites. Avoid eBay deals too good to be true—$5 clay kits are suspect.
Read reviews: Look for verified purchases mentioning performance. If it doesn’t grab contaminants well, it’s fake.
For brands like Chemical Guys, check their authenticity guides online.
Pro tip: Scan barcodes with apps to verify.
Maintenance After Removal: Keeping That Shine
Post-removal, apply a quality wax like Carnauba-based ones from Turtle Wax—seals pores and adds protection.
Wash bi-weekly, clay annually for maintenance.
Store your car covered if possible; garage queens last longer.
I’ve seen vehicles maintain showroom condition for years with this routine.
Personal Stories from the Shop
Back in ’12, a guy brought in his Dodge Challenger with white house paint overspray from a neighbor’s reno. He tried acetone—big mistake, dulled the black clear coat. I clayed it out with Chemical Guys medium bar, polished with Menzerna, and it looked new. He was thrilled, tipped me extra.
Another time, on a fleet of rental cars, industrial overspray from a factory nearby. Used Griot’s clay in bulk—saved the company thousands versus repaints.
Common questions? “Will this void my warranty?” Nah, as long as you don’t damage it. Or “How long does it take?” Couple hours for a full car, if you’re methodical.
Conclusion
Wrapping this up, removing oversngxay without harming your clear coat boils down to patience, the right tools like a good clay bar, and gentle techniques. Key takeaways: Act quick, always lubricate, and follow up with wax for lasting protection. By choosing reputable US brands like Meguiar’s or Chemical Guys, you’ll avoid fakes and get reliable results. Smarter decisions come from testing small areas and knowing your vehicle’s paint type—check your owner’s manual or VIN for specs. One final pro tip: If it’s heavy overspray, consider a pro detailer first time around; I’ve turned DIY disasters into successes, but prevention beats cure.
FAQ
What Household Items Can Remove Overspray from Car Paint?
Stick to safe ones like rubbing alcohol diluted with water on a microfiber cloth for light spots. Avoid vinegar or baking soda—they can etch. I’ve used alcohol on trim successfully, but always test.
Is WD-40 Safe for Removing Overspray Without Damaging Clear Coat?
It works in a pinch by loosening bonds, but rinse thoroughly as residues build up dirt. Better alternatives like clay bars are safer long-term—I’ve seen WD-40 cause yellowing on lighter paints.
Can You Remove Overspray from Glass Without Scratching?
Yes, use a plastic razor blade with soapy water, or clay bar. For stubborn bits, warm white vinegar wipes it off. I do this on windshields often; keeps visibility crystal clear.
How Much Does Professional Overspray Removal Cost in the US?
Expect $100–300 depending on vehicle size and severity—cheaper in Midwest shops like mine, pricier in Cali. DIY saves big, but if unsure, pros ensure no damage.
What’s the Best Clay Bar for Beginners Removing Overspray?
Meguiar’s fine grade kit—affordable at around $20, includes lube, and forgiving on clear coats. Start small; I’ve recommended it to auto students learning the ropes.
