The brake system is one of the most critical parts of any car, and understanding how it works can help you spot problems early and keep your vehicle safe. When people ask me “How Does the Brake System Work in a Car?”, I like to explain it in simple terms: brakes use a combination of hydraulic pressure, friction, and mechanical leverage to slow down or stop your car.
Every time you press the brake pedal, that force is transferred through brake fluid to the calipers, which squeeze the brake pads against the rotors—or, in drum brakes, push shoes against the drum—to create friction that slows the wheels.
I’ve worked on countless braking systems in my garage, from worn pads and warped rotors to leaking brake lines and air in the system. The key to understanding brakes is realizing that each component—the pedal, master cylinder, brake lines, calipers, pads, and rotors—relies on the others.
A failure in just one part can compromise stopping power, affect handling, or even make your car unsafe to drive. In this guide, I’ll break down each component, explain how it works, and share practical tips for maintaining your brakes so they stay reliable, responsive, and safe on the road.

Image by howstuffworks
How Does the Brake System Work in a Car?
I’ve spent countless hours under the hood and in the garage, wrench in hand, working on everything from beat-up pickup trucks to sleek sedans. One question I hear all the time from DIY mechanics and curious car owners is, “How does the brake system work in a car?” It’s a great question, because brakes are the unsung heroes of your vehicle. They’re your first line of defense for safety, and understanding how they function can save you money, keep your car reliable, and—most importantly—keep you and your passengers safe. In this deep dive, I’ll break down the brake system, share real-world insights from my time in the shop, and give you practical tips for maintenance, replacement, and choosing the right parts. Whether you’re a weekend wrench-turner or just want to know what’s going on when you press that pedal, this guide’s got you covered.
Why Your Car’s Brake System Matters
Your brake system is the heart of your vehicle’s safety. Without it, you’re rolling the dice every time you hit the road. Brakes don’t just stop your car—they manage speed, ensure control in emergencies, and even impact fuel efficiency by reducing drag from poorly maintained components. A failing brake system can lead to costly repairs, compromised performance, or worse, accidents. I’ve seen customers limp into the shop with grinding rotors or spongy pedals, and it’s always a wake-up call. Understanding how your brakes work and keeping them in top shape is non-negotiable for any driver.
What Is a Car Brake System and How Does It Work?
The Basics of the Brake System
The brake system in a car is a complex network of components that work together to slow or stop your vehicle. When you press the brake pedal, you’re triggering a chain reaction that converts your foot’s pressure into stopping power.
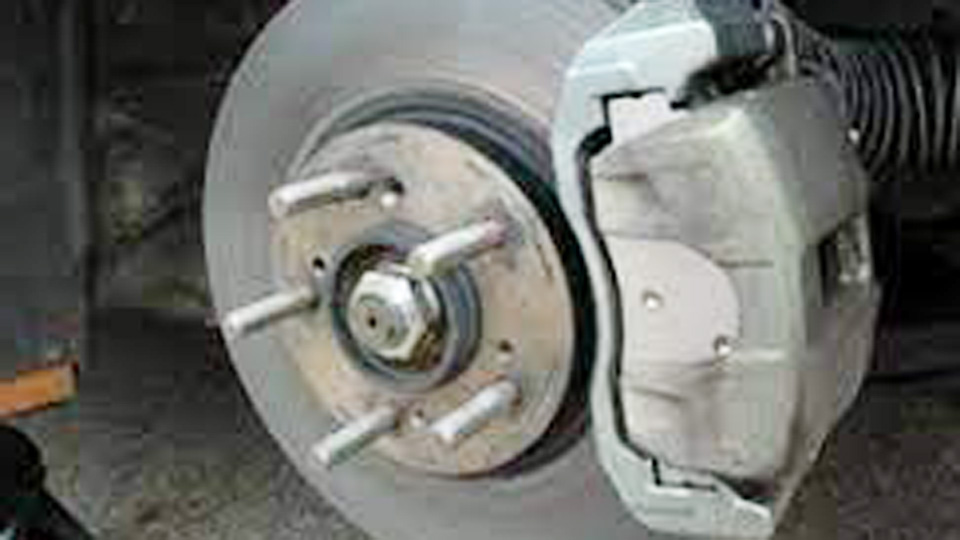
Most modern cars in the US use hydraulic disc brakes, though some older or lighter vehicles still have drum brakes in the rear. The system relies on friction to slow the wheels, with parts like brake pads, rotors, calipers, and fluid all playing critical roles.
Here’s the simplified version of how it works: You press the pedal, which pushes brake fluid through lines to the calipers (or wheel cylinders in drum brakes). The calipers squeeze brake pads against a spinning rotor, creating friction that slows the wheel. In drum brakes, shoes push outward against a drum. It’s a beautifully simple concept, but the execution involves precision engineering.
Key Components of the Brake System
Let’s break down the main players in your brake system:
- Brake Pedal: Your input device. It’s connected to the master cylinder and starts the whole process.
- Master Cylinder: This converts pedal pressure into hydraulic pressure, pushing fluid through the lines.
- Brake Lines and Hoses: These carry brake fluid to the wheels. Steel lines handle most of the journey, while flexible hoses connect to the moving parts.
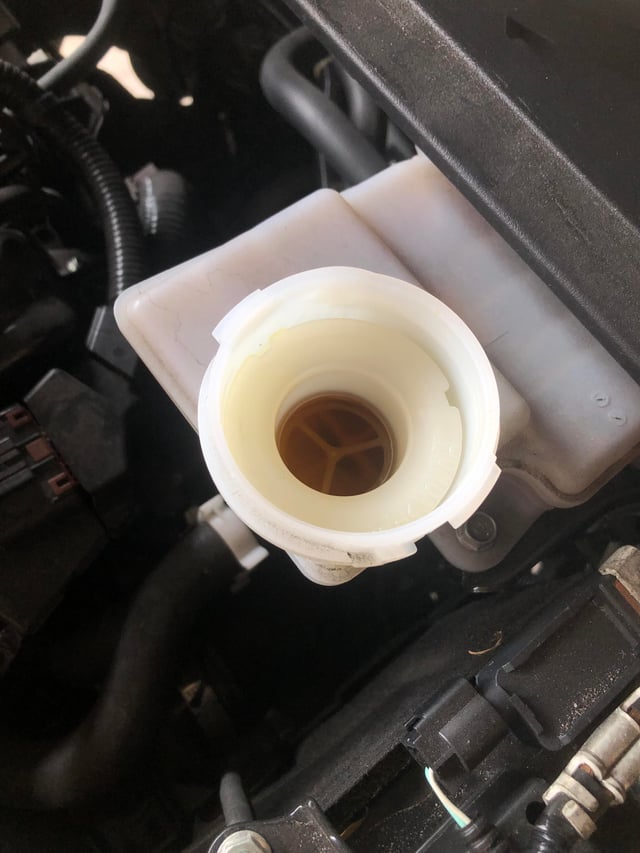
- Brake Fluid: The lifeblood of the system, transferring force from the pedal to the brakes.
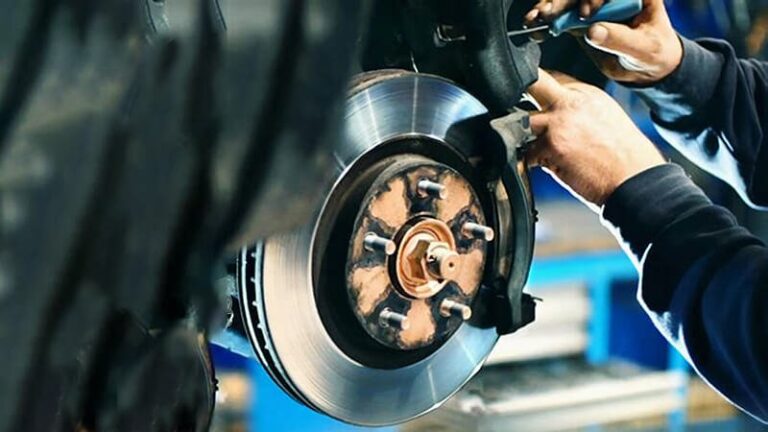
- Calipers and Pads (Disc Brakes): Calipers house the pads and squeeze them against the rotor to create friction.
- Rotors (Discs): The spinning metal discs that pads grip to slow the car.
- Drum Brakes and Shoes: Found on some rear wheels, these use shoes that push outward against a drum to stop the car.
- Brake Booster: Uses vacuum (or electric power in some newer cars) to amplify your pedal force, making braking easier.
Each part has to work flawlessly. A single weak link—like low fluid or worn pads—can compromise the whole system. I’ve seen a rusted brake line snap during a test drive, leaving the pedal useless. It’s not a feeling you forget.
Common Problems and Signs of Brake System Failure
Brake issues creep up, and catching them early can save you a fortune. Here are signs I’ve seen in the shop that scream “check your brakes”:
Spongy or Soft Pedal: Feels like you’re pressing a marshmallow? That’s often air in the brake lines or low fluid. I once had a customer with a slow leak in their master cylinder—barely noticeable until they needed to stop fast.
Grinding or Squealing: Grinding means your pads are gone, and metal’s kissing metal. Squealing might just be a wear indicator, but don’t ignore it. I’ve seen rotors scored beyond repair because someone ignored the noise.
Vibration or Pulsing: If your pedal or steering wheel shakes when braking, your rotors might be warped. I’ve resurfaced rotors for customers who caught this early, saving them from a full replacement.
Pulling to One Side: Uneven brake wear or a stuck caliper can cause this. I fixed a Chevy Silverado that pulled hard left because one caliper was seized.
Burning Smell or Smoke: Overheated brakes from dragging pads or aggressive driving. Pull over immediately—this isn’t a “wait and see” issue.
When and Why Brake Replacement Is Needed
Brake components don’t last forever. Pads typically wear out every 20,000–50,000 miles, depending on driving habits and conditions. Rotors last longer (50,000–70,000 miles), but warped or scored ones need replacing sooner. Brake fluid should be flushed every 2–3 years to prevent corrosion and maintain performance. Calipers and lines can last the life of the car but fail if neglected or exposed to harsh conditions like salted winter roads.
You’ll need to replace parts when:
- Pads are worn below 1/4 inch (check with a caliper or eyeball it).
- Rotors are warped, grooved, or below the minimum thickness stamped on them.
- Fluid is dark or contaminated (it should be clear or slightly yellow).
- Calipers stick or leak, reducing braking power.
I’ve had customers limp in with pads so thin they were basically metal shavings. Don’t wait that long—regular inspections are key.
OEM vs Aftermarket Brake Parts: Which Should You Choose?
Understanding OEM and Aftermarket Options
When replacing brake parts, you’ve got two main choices: OEM (Original Equipment Manufacturer) or aftermarket. OEM parts come from the same company that made your car’s original components—think Ford, Toyota, or GM. Aftermarket parts are made by third-party companies like Bosch, Brembo, or Wagner.
Here’s a comparison table based on my experience in the US market:
| Feature | OEM Brake Parts | Aftermarket Brake Parts |
|---|---|---|
| Quality | Consistent, designed for your car model | Varies widely by brand |
| Price | $50–$150 per axle for pads; $100–$300 for rotors | $20–$100 for pads; $50–$200 for rotors |
| Availability | Dealerships, some auto stores | Widely available (AutoZone, NAPA, Amazon) |
| Warranty | Often 1–2 years | Varies (6 months to lifetime) |
| Performance | Matches factory specs | Can match or exceed OEM, but depends on brand |
| Fitment | Perfect fit for your vehicle | Usually good, but check compatibility |
Pros and Cons of OEM Brake Parts
Pros:
- Guaranteed fit and performance for your specific vehicle (e.g., OEM pads for a 2018 Honda Civic are a sure bet).
- Often backed by the manufacturer’s warranty.
- Peace of mind for those who stick to “what the factory intended.”
Cons:
- Expensive. I’ve seen OEM pads for a BMW cost double what a quality aftermarket set would.
- Limited availability outside dealerships, which can mean longer wait times.
Pros and Cons of Aftermarket Brake Parts
Pros:
- Cheaper, sometimes half the price of OEM. I’ve used Wagner pads on a Dodge Ram and saved the customer $100 without sacrificing quality.
- Wide variety of performance options (e.g., ceramic pads for less dust or high-performance pads for spirited driving).
- Easy to find at places like AutoZone or online.
Cons:
- Quality varies. Cheap no-name brands can wear out fast or squeal like a banshee.
- Fitment issues with low-end parts. I once had to return a set of rotors that didn’t align properly on a Ford F-150.
My Go-To Brands in the US Market
For OEM, stick with your car’s brand (e.g., Mopar for Chrysler, ACDelco for GM). For aftermarket, I trust:
- Bosch: Reliable, quiet, and widely available. Great for daily drivers like a Toyota Camry.
- Brembo: Top-tier for performance cars (Mustangs, Corvettes). I installed Brembo pads on a buddy’s Charger, and he swears by the stopping power.
- Wagner: Budget-friendly but solid for trucks and SUVs.
- Akebono: OEM supplier for many Japanese cars, with excellent ceramic options.
How to Spot Fake Brake Parts
Counterfeit brake parts are a real problem, especially online. I’ve seen knockoff pads that crumbled after 5,000 miles. Here’s how to avoid fakes:
Check Packaging: Genuine parts have clean, professional packaging with holograms or serial numbers. Sketchy boxes with misspellings are a red flag.
Buy from Reputable Sources: Stick to AutoZone, NAPA, or authorized dealers. Avoid shady Amazon sellers with prices too good to be true.
Inspect the Part: OEM and high-quality aftermarket pads have precise machining and consistent branding. Cheap pads often look rough or lack markings.
Verify Part Numbers: Cross-reference the part number with the manufacturer’s catalog. I caught a fake Brembo rotor this way for a customer’s Audi.
Installation Tips and Common Mistakes
Step-by-Step Guide to Replacing Brake Pads and Rotors
Replacing brakes isn’t rocket science, but it’s easy to mess up if you’re not careful. Here’s how I do it in the shop for a typical disc brake setup (e.g., a 2020 Chevy Equinox):
- Gather Tools: You’ll need a jack, jack stands, lug wrench, C-clamp, socket set (usually 13–17mm), torque wrench, brake cleaner, and anti-seize lubricant. A breaker bar helps with stubborn bolts.
- Safety First: Park on a flat surface, chock the wheels, and disconnect the battery if your car has electronic brakes (like some BMWs).
- Lift the Car: Loosen lug nuts, jack up the vehicle, and secure it on jack stands. Remove the wheel.
- Remove the Caliper: Unbolt the caliper (usually two bolts). Slide it off and hang it with a wire or bungee—don’t let it dangle by the brake line.
- Remove Old Pads: Pop the pads out. Note their orientation for the new ones.
- Compress the Caliper Piston: Use a C-clamp to slowly push the piston back into the caliper. Open the brake fluid reservoir cap to prevent pressure buildup.
- Remove and Replace the Rotor: Unbolt the rotor (if it’s held by screws) or pull it off. Clean the hub with a wire brush, then install the new rotor.
- Install New Pads: Apply anti-seize to the pad edges (not the friction surface). Slide them into place.
- Reassemble: Bolt the caliper back on, torque to spec (check your car’s manual—usually 20–30 ft-lbs for caliper bolts).
- Check Fluid and Test: Top off brake fluid, pump the pedal to seat the pads, and test-drive at low speed.
Common Installation Mistakes
- Not Cleaning the Hub: Rust or debris can cause rotor runout, leading to vibrations. I’ve had to redo jobs because of this.
- Over-tightening Bolts: Use a torque wrench. I stripped a caliper bolt once as a rookie—never again.
- Forgetting to Bed the Pads: New pads need a break-in period. Do 5–10 gentle stops from 30 mph to transfer material evenly.
- Ignoring the Fluid: Old, dirty fluid can cause spongy brakes. Flush it if it’s dark or gritty.
Maintenance Tips for Long-Lasting Brakes
- Inspect Regularly: Check pad thickness every oil change (every 5,000–7,000 miles).
- Flush Brake Fluid: Every 2–3 years, use DOT 3 or DOT 4 fluid (check your manual). I use Prestone DOT 3 for most US cars.
- Clean Components: Spray brake cleaner on rotors and calipers to remove dust and grime.
- Avoid Hard Braking: Constant aggressive stops wear pads faster. I tell customers to “drive like you’re carrying eggs.”
Real-World Anecdotes from the Garage
I’ll never forget the time a customer rolled in with a 2015 Ford Explorer, complaining of a “clunk” when braking. I jacked it up, expecting a loose caliper, but found a rotor so warped it looked like a potato chip. The guy had been towing a trailer in the mountains and riding the brakes hard. We replaced the rotors with OEM Ford ones, and I showed him how to downshift to save his brakes next time. He’s been a regular ever since, always asking for tips.
Another time, a DIYer came in with a botched brake job on his Jeep Wrangler. He’d used cheap Amazon pads, and they were squealing louder than a bad karaoke night. We swapped them for Akebono ceramics, and the noise vanished. Lesson learned: don’t skimp on brakes.
Conclusion
Your car’s brake system is a marvel of engineering, but it’s only as good as the care you give it. Whether you’re replacing pads, flushing fluid, or upgrading to performance rotors, understanding how the system works empowers you to make informed choices. Stick with trusted brands like Bosch or Brembo, inspect your brakes regularly, and don’t ignore warning signs like squealing or vibrations. For DIYers, invest in quality tools and take your time—rushing a brake job is a recipe for trouble.
Common Brake System Questions
Why Do My Brakes Squeal When I Stop?
Squealing is usually the wear indicator on your pads telling you they’re low. It could also be dust, glazing, or cheap pads. Inspect the pads and clean the rotors. If the noise persists, try Akebono or Bosch ceramic pads—they’re quieter.
How Often Should I Replace Brake Fluid?
Every 2–3 years or 30,000 miles, flush the system with fresh DOT 3 or DOT 4 fluid. Dark or gritty fluid means it’s overdue. I’ve seen neglected fluid corrode calipers, costing hundreds in repairs.
Can I Mix OEM and Aftermarket Brake Parts?
Yes, but ensure compatibility. For example, OEM rotors with aftermarket pads work fine if the pads are high quality. I’ve mixed Brembo pads with Toyota rotors on a Camry with no issues.
How Do I Know If My Rotors Need Replacing?
Check for deep grooves, warping (vibration when braking), or if they’re below the minimum thickness (stamped on the rotor). I always measure with a micrometer to be sure.
Are Ceramic Brake Pads Worth It?
For daily drivers, yes. They’re quieter, produce less dust, and last longer than semi-metallic pads. I put Akebono ceramics on my wife’s Honda CR-V, and the wheels stay cleaner for months.


