Sticking an interior rearview mirror back onto a car windshield is one of those little fixes that looks tricky but is actually pretty straightforward if you use the right method. I’ve had plenty of drivers come into my garage asking “How to Stick an Interior Mirror in a Car?”—usually after the mirror fell off on a hot day when the glue gave out. The key is using the right adhesive and prep work, because regular glue or double-sided tape won’t hold up against heat, vibration, and daily use.
Here’s how I usually do it: first, clean both the glass and the metal mounting button (the small piece that attaches to the glass) with a razor blade and alcohol to remove any old adhesive. Then, mark the correct spot on the windshield so your mirror sits at the proper height.
After that, apply a specialized rearview mirror adhesive kit—these are designed to handle high temperatures and keep the bond strong. Finally, let it cure as directed (usually 15–30 minutes) before reattaching the mirror to the button.
I’ll walk you step by step through the process, share some pro tips to avoid crooked placement, and explain which adhesives hold up best so you don’t have to worry about your mirror dropping off again the next time the sun bakes your car.

Image by reddit
Why Your Interior Rearview Mirror Matters
The interior rearview mirror is more than just a shiny piece of glass—it’s your window to what’s happening behind you. A properly functioning mirror ensures you can spot tailgaters, emergency vehicles, or that distracted driver swerving into your lane. In my years in the shop, I’ve seen loose mirrors cause near-misses because drivers couldn’t glance back quickly enough.
A detached or wobbly mirror also screams neglect, which can lower your car’s resale value or make it fail a state inspection in places like Texas or Pennsylvania. From a cost perspective, fixing it yourself is a no-brainer—professional shops might charge $50–$100 for a 15-minute job you can do for under $20 with the right tools and adhesive.
Common Problems with Interior Rearview Mirrors
What Is the Interior Rearview Mirror and What Does It Do?
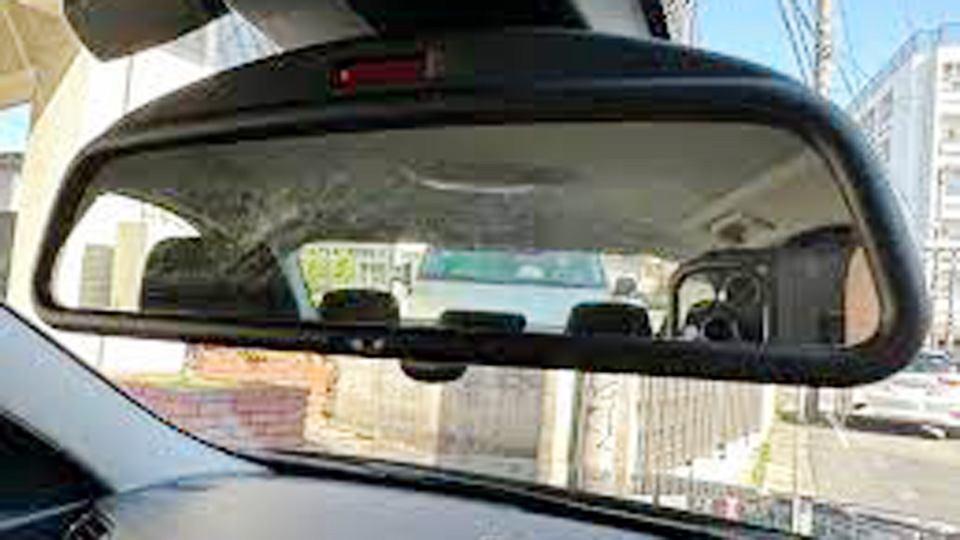
The interior rearview mirror is a small, adjustable mirror mounted on your windshield, usually via a metal or plastic base (called a “button” or “mount”) that’s glued to the glass. It pivots to let you adjust your view and often includes features like auto-dimming or integrated displays in newer vehicles. In older cars, it’s a simple glass-and-plastic setup, but in modern models, it might house sensors or cameras for advanced driver-assistance systems (ADAS).
Signs of a Failing or Loose Mirror
In my shop, I’ve seen mirrors fail in a few predictable ways:
- Completely detached: The mirror and its mount fall off the windshield, often leaving the metal button behind.
- Wobbly or loose: The adhesive weakens, causing the mirror to vibrate or shift during driving.
- Cracked or misaligned: The mirror glass cracks, or the mount twists, making it hard to adjust.
- Adhesive residue: Old glue leaves a mess, complicating reattachment.
These issues often stem from heat exposure (parked cars in Arizona or Florida can hit 140°F inside), poor-quality adhesive, or improper installation. I once had a customer bring in a 2015 Ford F-150 where the mirror fell off after a hot summer day—turns out, the previous owner used cheap double-sided tape instead of proper adhesive. Don’t make that mistake.
When and Why Replacement or Reattachment Is Needed
You’ll need to reattach or replace the mirror if:
- It’s fallen off entirely, leaving you without rear visibility.
- Vibrations make it unusable (common in trucks or SUVs driven on rough roads).
- The mount or adhesive is damaged, preventing a secure bond.
- You’re upgrading to a mirror with modern features like auto-dimming or a backup camera display.
Ignoring a loose mirror can lead to distracted driving or even a ticket in states with strict vehicle safety laws. Plus, a dangling mirror can crack your windshield if it swings into the glass during a hard stop.
Choosing the Right Mirror and Adhesive: OEM vs Aftermarket
OEM vs Aftermarket Mirrors
When replacing or reattaching your mirror, you’ve got two main options: OEM (Original Equipment Manufacturer) or aftermarket parts. Here’s how they stack up based on my experience:
| Aspect | OEM Mirror | Aftermarket Mirror |
|---|---|---|
| Quality | Built to exact factory specs, ensuring fit and durability. | Varies widely; some match OEM, others are flimsy. |
| Compatibility | Guaranteed to fit your vehicle’s make/model. | May require modifications or adapters. |
| Cost | $50–$150 (e.g., $80 for a 2018 Honda Civic OEM mirror). | $10–$50, but cheaper ones often lack features. |
| Availability | Dealerships or online (eBay, Amazon). | Widely available at auto parts stores. |
| Warranty | Often comes with a 1-year warranty. | Rarely warranted; depends on the brand. |
OEM Pros: Perfect fit, especially for newer cars with tech-heavy mirrors (e.g., Toyota Camry with HomeLink). I’ve used OEM mirrors for customers who want a factory look and feel, like on a 2020 Chevy Silverado with an integrated backup camera.
OEM Cons: Pricey, and dealerships can take days to order them. I once waited a week for a Dodge Ram mirror to arrive.
Aftermarket Pros: Affordable and easy to find at places like AutoZone or O’Reilly. Brands like Dorman or WVE are decent for budget fixes.
Aftermarket Cons: Some aftermarket mirrors feel cheap or don’t align perfectly. I had a customer with a 2016 Jeep Wrangler who bought a $15 mirror that wobbled within a month.
My Take: If your car is newer or has advanced features, stick with OEM. For older models (like a 2005 Ford Mustang), a quality aftermarket mirror from a reputable brand works fine.
Choosing the Right Adhesive
The adhesive is the heart of this repair. The metal button that holds your mirror must bond securely to the windshield. Here are the top options in the US market:
- Permatex Rearview Mirror Adhesive: A two-part adhesive (activator and glue) that’s industry-standard. Costs $5–$10 and works on most vehicles.
- Loctite Glass Glue: A single-tube option for simpler repairs. Around $6, but less durable in extreme heat.
- 3M Auto Glass Urethane: Professional-grade, used in shops. Costs $15–$20 but overkill for DIY.
Pro Tip: Always use a rearview mirror adhesive kit, not household superglue or epoxy. I learned this the hard way when a customer tried using Gorilla Glue—messy and weak bond.
Spotting Genuine vs. Fake Parts
Counterfeit parts are a real issue. I’ve seen fake OEM mirrors on eBay that cracked after a week. To avoid fakes:
- Buy from reputable retailers (dealerships, AutoZone, or verified Amazon sellers).
- Check packaging for misspellings or poor print quality.
- Verify part numbers against your vehicle’s manual or OEM catalog.
- Look for holographic seals or serial numbers on OEM parts.
Step-by-Step Guide: How to Stick an Interior Mirror in Your Car
Here’s my tried-and-true process for reattaching a rearview mirror, based on countless repairs in the shop. This works for most US vehicles, from a 1998 Toyota Corolla to a 2023 GMC Sierra.
Tools and Materials Needed
- Rearview mirror adhesive kit (Permatex recommended)
- Razor blade or scraper
- Rubbing alcohol or glass cleaner
- Marker or painter’s tape
- Gloves and safety glasses
- Clean cloth
- Optional: Heat gun or hairdryer (for cold weather)
Step-by-Step Instructions
Prepare the Windshield:
- Remove any old adhesive or residue from the windshield using a razor blade. Be gentle to avoid scratching the glass. I once spent 20 minutes scraping old glue off a 2010 Honda Accord’s windshield—it’s tedious but critical.
- Clean the area with rubbing alcohol or glass cleaner. Ensure it’s dry and free of dust.
Mark the Spot:
- If the metal button is still on the windshield, skip this step. Otherwise, mark the exact spot where the mirror was mounted using a marker or painter’s tape. Check your vehicle’s manual for the factory position (usually centered, 2–3 inches from the windshield’s top edge).
Prepare the Button:
- If reusing the old button, clean it with alcohol to remove old adhesive. If it’s damaged, replace it with an OEM or aftermarket button specific to your vehicle.
- Lightly sand the button’s bonding surface with fine-grit sandpaper for better adhesion.
Apply the Adhesive:
- For Permatex kits, apply the activator (usually a small wipe or liquid) to both the windshield and the button. Let it sit for 1–2 minutes.
- Apply a small drop of adhesive to the button’s bonding surface. Less is more—too much glue can ooze out and make a mess.
Attach the Button:
- Press the button firmly onto the marked spot on the windshield. Hold it for 30–60 seconds, applying steady pressure. I’ve found that humming a short song helps time it right.
- Let the adhesive cure for at least 1 hour (24 hours for maximum strength). In cold weather, use a heat gun to warm the windshield slightly for a better bond.
Mount the Mirror:
- Slide or snap the mirror onto the button, following your vehicle’s design (some require a set screw or clip). For example, my buddy’s 2017 Subaru Outback needed a quick twist to lock it in place.
- Adjust the mirror to your driving position and test for stability.
Clean Up:
- Wipe away any excess adhesive with alcohol before it dries. Check for smudges on the windshield that could obstruct your view.
Common Mistakes to Avoid
- Using the wrong adhesive: Household glue won’t withstand heat or vibrations. Stick to mirror-specific products.
- Not cleaning properly: Dirt or oil on the windshield or button weakens the bond. I’ve seen mirrors fall off within days because of this.
- Rushing the cure time: Driving too soon can dislodge the button. Patience is key.
- Misaligning the button: If it’s off-center, your mirror won’t adjust properly, forcing you to redo the job.
Maintenance Tips for a Long-Lasting Mirror
Once your mirror is reattached, a little care goes a long way:
- Avoid extreme heat: Park in the shade or use a windshield sunshade in hot climates to reduce adhesive stress.
- Check periodically: Every few months, give the mirror a gentle tug to ensure it’s secure.
- Clean gently: Use glass cleaner, not abrasive chemicals, to clean the windshield around the mirror.
- Inspect after off-roading: Vibrations from rough terrain (common in Jeeps or Tacomas) can loosen the bond over time.
I once had a customer with a 2014 Ram 1500 who kept losing his mirror because he parked in direct sunlight daily. A simple sunshade and periodic checks solved the problem.
Real-World Anecdotes from the Garage
One of my favorite stories is from a busy Saturday in the shop when a guy rolled in with a 2008 Chevy Impala, mirror dangling by its wiring harness. He’d tried taping it back on with duct tape—classic DIY fail. We cleaned the windshield, used Permatex adhesive, and had it rock-solid in 20 minutes. He was amazed at how simple it was but admitted he didn’t know mirror adhesive existed. That’s why I love sharing these tips—it empowers drivers to tackle small fixes confidently.
Another time, a customer with a 2019 BMW 3 Series came in worried about her auto-dimming mirror. She thought the whole unit needed replacing ($200+), but it was just a loose button. A $6 adhesive kit and 15 minutes later, she was back on the road, grinning ear to ear. These small wins remind me why I love this work.
Conclusion: Stick It Right and Drive Safe
Reattaching your car’s interior rearview mirror is a straightforward job that any DIYer or enthusiast can handle with the right tools and know-how. By choosing a quality adhesive, cleaning thoroughly, and following a careful process, you’ll have a mirror that stays put for years.
Whether you opt for an OEM part for your high-tech SUV or a budget-friendly aftermarket mirror for your trusty sedan, the key is precision and patience. Not only will you save money over a shop visit, but you’ll also ensure safer driving with a clear view of the road behind you.
FAQ: Common Questions About Interior Rearview Mirrors
How do I know if my rearview mirror adhesive is failing?
If your mirror wobbles, vibrates excessively, or feels loose when you adjust it, the adhesive is likely weakening. Check for cracks in the glue or a detached button. Reattach it promptly to avoid a complete failure.
Can I use superglue to stick my car mirror?
No, superglue isn’t designed for automotive use. It can’t handle the heat, vibrations, or weight of a rearview mirror. Use a mirror-specific adhesive like Permatex for a secure bond.
How long does rearview mirror adhesive take to dry?
Most adhesives, like Permatex, need 1 hour to set enough for light use and 24 hours for full strength. Avoid driving or adjusting the mirror during this time.
Should I replace the mirror or just the adhesive?
If the mirror glass or mount is damaged, replace the whole unit. If only the button is loose or detached, reattaching it with adhesive is enough. Check your vehicle’s manual for compatibility.
Where can I buy a rearview mirror for my car?
OEM mirrors are available at dealerships or online (eBay, Amazon). Aftermarket options are at AutoZone, O’Reilly, or Advance Auto Parts. Always verify the part number for your make and model.


