I’ve had plenty of drivers pull up to my garage in a panic, pointing at their dashboard and asking, “Why is the red brake light on in my car?” And honestly, it’s a smart question—because when that light comes on, it’s not something to ignore.
The red brake warning light is your car’s way of saying, “Hey, something’s not right with the braking system.” It could be as simple as the parking brake being left slightly engaged, or it could mean something more serious—like low brake fluid, worn brake pads, or even a failing master cylinder. I’ve seen cases where drivers thought it was just a “sensor glitch,” only to discover their brakes were seconds away from failing.
Here’s the thing: that little red light is tied directly to your safety. Brakes aren’t just another part; they’re the line between stopping safely at a red light and rolling into an accident. Whenever I see that light in my own car, I don’t take chances—I check the basics right away and, if needed, get under the hood to diagnose the system.
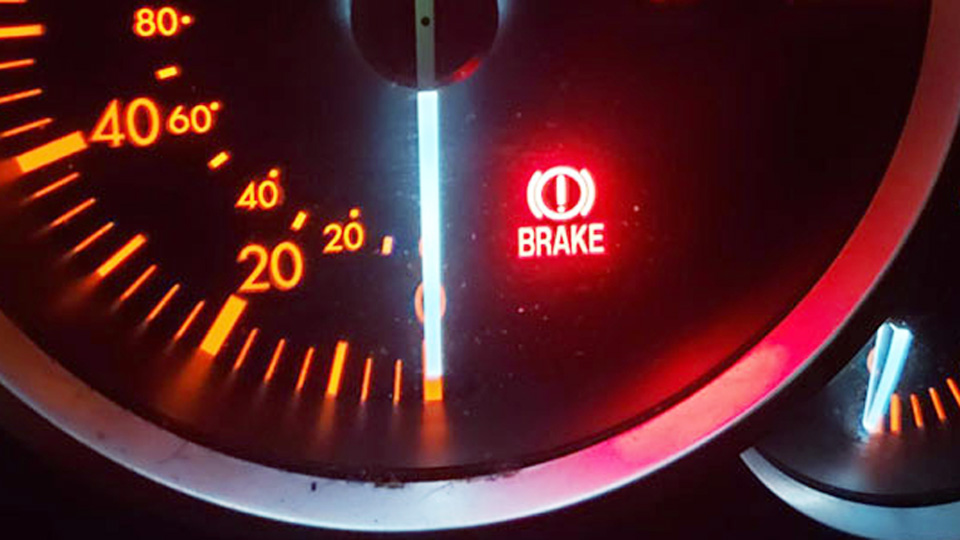
Image by autozone
Red Brake Light on Your Dashboard
That red brake light isn’t just a random glow; it’s tied directly to your vehicle’s brake system sensors. In most cars, it’s triggered by things like low brake fluid pressure, an engaged parking brake, or electronic faults in modern ABS setups. I’ve pulled into plenty of driveways where the owner swears their brakes feel fine, but that light tells a different story.
Think of it as your car’s early warning system. On older models like a ’90s Ford Explorer, it’s often a simple hydraulic switch. Newer ones, say a 2020 Toyota Camry, might integrate with the ECU for more precise diagnostics. Safety is key here—I’ve seen accidents avoided because someone heeded that light and checked their pads before a long highway trip.
Common Reasons the Red Brake Light Comes On
I’ve diagnosed hundreds of these lights. It’s rarely just one thing, but let’s break it down. Start by safely pulling over and checking the basics—no need to panic yet.
First off, is your parking brake fully released? I’ve had customers roll in with the light on, only to find they’d bumped the lever while grabbing a coffee. Simple fix: disengage it and see if the light goes out.
If not, low brake fluid is the usual suspect. Fluid levels drop naturally over time due to pad wear, but a sudden drop screams leak. Performance dips too—spongy pedals mean less stopping power, which I’ve felt firsthand on test drives.
Worn brake pads or shoes can also trigger it via sensors in many vehicles. Those pads are your friction heroes, but they wear out every 30,000 to 70,000 miles depending on driving style. I’ve swapped pads on Subarus in snowy conditions where salt accelerates wear—reliability takes a hit if ignored.
Then there’s the ABS system. If your car has anti-lock brakes, a faulty sensor or module might light it up. Cost can add up here; I’ve quoted $200 for a sensor swap on a Chevy Malibu.
Hydraulic issues like a failing master cylinder or brake lines are rarer but serious. Fuel efficiency? Not directly, but dragging brakes from a stuck caliper can hurt your MPG.
Checking for Low Brake Fluid: The First Step
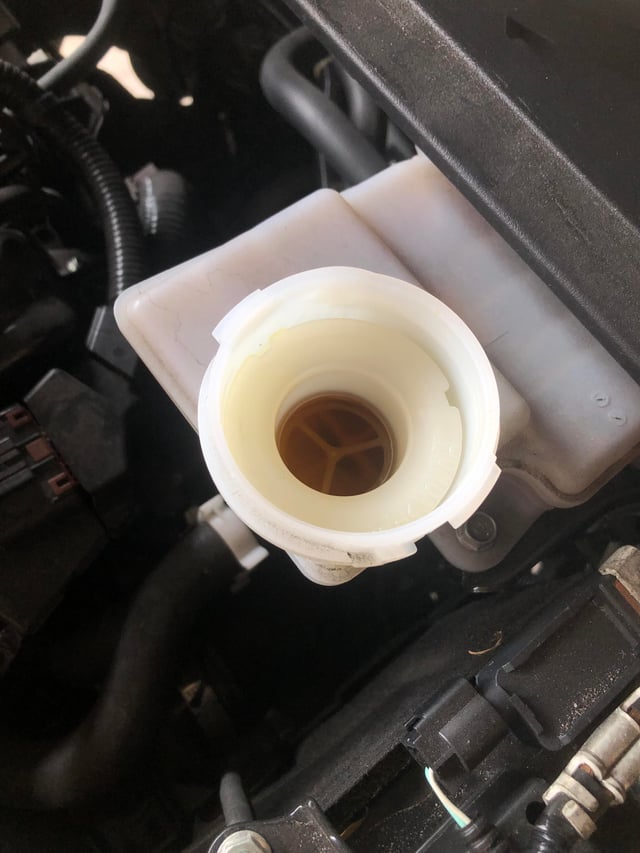
Low brake fluid is the number one reason I’ve seen for that red light. Brake fluid is the lifeblood of your hydraulic system—it transfers pedal force to the calipers or drums to stop your wheels.
What does it do? It operates under high pressure without compressing, ensuring consistent braking. Common problems: leaks from worn seals or hoses, or just evaporation over time.
Signs of failure include a soft pedal feel or the light flickering on turns when fluid sloshes low. I’ve had a guy with a Dodge Ram come in; his light was on intermittently, and sure enough, a tiny weep from the rear wheel cylinder was the culprit.
Replacement is needed when levels drop below the “MIN” mark on the reservoir. Don’t just top it up—find the cause. For US cars, DOT 3 or DOT 4 fluid is standard; always match your owner’s manual.
OEM vs aftermarket: OEM from brands like Ford or GM ensures compatibility, but aftermarket like Prestone or Valvoline works fine and costs less—around $5-10 a bottle versus $15 OEM. Pros of OEM: exact spec match for warranty. Cons: pricier. Aftermarket pros: widely available at AutoZone or O’Reilly. Cons: potential for lower boiling points in cheap stuff.
Installation tips: Park on level ground, clean the cap to avoid contamination, and bleed the system if you add a lot. Common mistake: mixing fluid types—DOT 5 is silicone-based and doesn’t mix with others. I’ve ruined a system once early in my career by not checking that.
Maintenance: Check monthly, especially in humid areas where moisture absorption leads to corrosion. Pro tip: Use a turkey baster to suck out old fluid before topping up for a mini flush.
Personal anecdote: I was working on a friend’s Jeep Wrangler last summer. Light came on during an off-road trip—turned out to be a cracked reservoir from vibration. Swapped it with an aftermarket one for $20, bled the lines, and we were back on the trail. Saved him a tow bill.
Dealing with Worn Brake Pads and Rotors
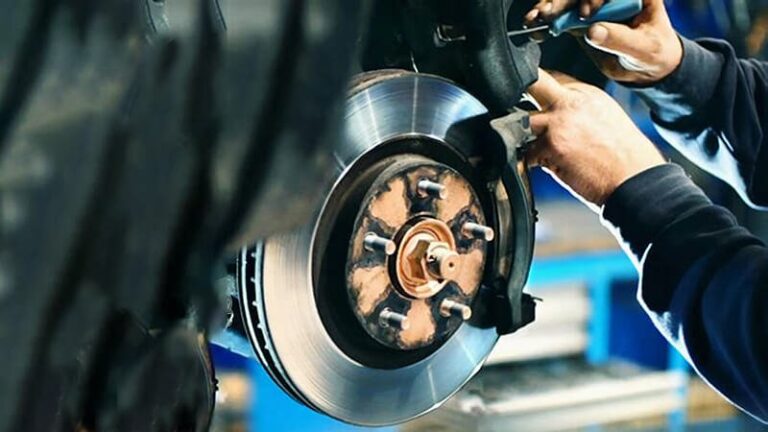
Ah, brake pads—the unsung heroes that take the heat (literally) every time you stop. They’re friction material sandwiched between metal backing plates, pressing against rotors to slow you down.
What they do: Convert kinetic energy to heat, stopping your car safely. Common problems: Wear from city driving or heavy loads. Signs: Squealing, grinding, or that light if your car has wear sensors (common on Europeans like BMW).
Why replace? Safety first—thin pads mean metal-on-metal contact, ruining rotors and increasing stopping distances. I’ve measured pads down to 2mm on a Toyota Tacoma; owner said brakes felt “grabby,” but the light saved him from failure.
OEM vs aftermarket: OEM from ACDelco for GM vehicles or Bosch for imports offer perfect fit and quiet operation, but at $50-100 per axle. Aftermarket like Wagner or PowerStop: cheaper ($30-70), often with ceramic for less dust. Pros of OEM: Longevity and no squeal. Cons: Cost. Aftermarket pros: Performance upgrades like slotted for better heat dissipation. Cons: Might wear faster if low-quality.
Here’s a quick comparison table:
| Aspect | OEM Brake Pads | Aftermarket Brake Pads |
|---|---|---|
| Price (per axle) | $50-100 | $30-70 |
| Brands (US) | ACDelco, Motorcraft | Wagner, PowerStop, EBC |
| Durability | High, matches vehicle spec | Varies; premium ones match OEM |
| Noise/Dust | Low | Ceramic options reduce dust |
| Compatibility | Perfect for Ford, Chevy, etc. | Broad, but check fitment |
Installation: Jack up the car safely—use stands, not just the jack. Remove wheels, compress caliper piston with a C-clamp, slide in new pads. Torque bolts to spec (usually 80-100 ft-lbs). Common mistake: Not bedding in pads—drive gently for the first 200 miles to avoid glazing.
Maintenance: Inspect every oil change. Rotate tires to even wear. Tools needed: Socket set, brake cleaner, anti-seize for bolts.
Anecdote: Fixed a Nissan Altima where the light was on due to uneven pad wear from a seized caliper. Customer was a delivery driver—pads were shot on one side. Went with aftermarket ceramics; he loved the cleaner wheels.
Tips for genuine vs fake: Look for holograms on packaging from reputable brands. Fakes often have poor riveting or uneven material. Buy from trusted spots like NAPA, not shady online deals.
Addressing Parking Brake Issues
The parking brake, or e-brake, is that lever or pedal that holds your car still on hills. It’s mechanical, using cables to engage rear brakes.
What it does: Provides backup braking and secures the vehicle when parked. Common problems: Stuck cables from rust or improper adjustment.
Signs: Light stays on even when released. I’ve seen this on older Hondas where winter salt corrodes everything.
Replacement needed if cables snap or adjusters fail—rare, but happens after 100,000 miles.
OEM vs aftermarket: OEM cables from Mopar for Jeeps or Toyota are precise but $50-80. Aftermarket like Dorman: $20-40, durable enough. Pros OEM: Exact length. Cons: Availability. Aftermarket pros: Quick ship from Amazon or RockAuto. Cons: Might need adjustment.
Installation: Chock wheels, release tension, swap cable under the car. Use cable lube. Mistake: Over-tightening, causing drag.
Maintenance: Engage it regularly to prevent seizing. Safety: Work on flat ground; brakes can fail if not secured.
Story: Helped a buddy with his Subaru Outback—light on because the e-brake pedal wasn’t fully up. Adjusted the cable in 10 minutes; he thought it was a big deal.
Troubleshooting Faulty Brake Sensors and Wiring
Modern cars have sensors everywhere—pad wear sensors, fluid level floats, ABS wheel speed sensors.
What they do: Monitor system health and trigger the light. Problems: Corrosion, damage from potholes, or electrical shorts.
Signs: Intermittent light, especially after rain. I’ve chased wiring issues on Fords where harnesses rub against frames.
Replacement: Sensors run $20-50 each. Needed when diagnostics show faults—use an OBD scanner.
OEM vs aftermarket: OEM Bosch for VWs or Delphi for GMs: reliable but $40+. Aftermarket: Standard Motor Products, cheaper at $25. Pros OEM: Plug-and-play. Cons: Price. Aftermarket: Good for older cars.
Comparison table:
| Feature | OEM Sensors | Aftermarket Sensors |
|---|---|---|
| Cost | $40-60 | $20-40 |
| US Brands | Delphi, Bosch | SMP, Dorman |
| Reliability | High | Solid if from trusted maker |
| Installation | Easy fit | May need splicing |
| Warranty | Often longer | Varies |
Installation: Unplug, swap, reset light with scanner. Mistake: Ignoring codes—always scan first.
Maintenance: Clean connections with dielectric grease.
Anecdote: On a Chevy Silverado, light was from a chewed wire—rodent damage! Replaced the sensor harness; owner added peppermint oil to deter critters.
Handling Brake Master Cylinder Failures
The master cylinder is the heart of your hydraulics—pumps fluid when you press the pedal.
What it does: Creates pressure for all brakes. Problems: Internal seals wear, causing leaks or soft pedals.
Signs: Light on with sinking pedal. Replacement every 100,000+ miles or after contamination.
OEM vs aftermarket: OEM from Aisin for Toyotas: $100-200. Aftermarket Cardone: $50-150 remanufactured. Pros OEM: New, precise. Cons: Cost. Aftermarket pros: Affordable rebuilds. Cons: Potential for early failure if not bench-bled.
Pros/cons: OEM reliability wins for daily drivers; aftermarket fine for classics.
Installation: Bench bleed first—fill and pump on the bench. Bolt in, bleed lines. Tools: Flare wrench, bleeder kit. Safety: Wear gloves; fluid eats paint.
Mistake: Not bleeding properly—air bubbles cause spongy brakes.
Story: Rebuilt one on a vintage Mustang—light was from a leaky seal. Owner was thrilled; brakes felt new.
Leaky Brake Lines and Hoses: A Hidden Danger
Brake lines are steel or rubber conduits carrying fluid.
What they do: Transport pressure without loss. Problems: Rust on steel lines, cracks in hoses from age.
Signs: Fluid puddles, light on. Common in rust belt states.
Replacement: Needed immediately for safety. Steel lines $20-50, hoses $15-30.
OEM vs aftermarket: OEM braided for performance cars. Aftermarket NiCopp lines resist rust better.
Table:
| Type | OEM Lines/Hoses | Aftermarket Lines/Hoses |
|---|---|---|
| Price | $30-60 | $15-40 |
| Material | Steel/rubber | Copper-nickel for longevity |
| Availability | Dealer | Auto parts stores |
| Durability | Standard | Often better anti-corrosion |
Installation: Flare ends, route carefully. Bleed after. Mistake: Kinking lines.
Maintenance: Inspect annually.
Anecdote: Fixed a leaking hose on a GMC Sierra—light saved the day before total failure on the interstate.
ABS System Faults and the Brake Light
ABS prevents wheel lockup during hard stops.
What it does: Modulates pressure for control. Problems: Faulty modules or sensors.
Signs: Light plus ABS light. Costly—modules $200-500.
OEM vs aftermarket: OEM for electronics. Aftermarket reman units save money.
Installation: Scan, replace, clear codes.
Story: Diagnosed a Honda Accord ABS pump—light was from a bad solenoid. Swapped with reman; smooth sailing.
How to Reset the Red Brake Light After Fixes
After repairs, the light might linger. Scan for codes, fix issues, then reset with an OBD tool or battery disconnect (but that erases radio presets).
Common mistake: Not addressing the root cause—light comes back.
Choosing the Right Tools for Brake Work
Essential: Jack stands, torque wrench, brake bleeder. Safety: Eye protection, gloves.
Pro tip: Invest in a Motive Power Bleeder for solo jobs—makes bleeding a breeze.
Spotting Genuine vs Counterfeit Brake Parts
Genuine have laser-etched codes, quality packaging. Fakes: Rough edges, no warranties. Stick to US chains like Advance Auto.
Conclusion
Wrapping this up, that red brake light is your car’s plea for attention—ignore it at your peril, but address it smartly to save time and money. Whether it’s topping fluid, swapping pads, or hunting leaks, always prioritize safety. Make smarter decisions by checking compatibility on sites like RockAuto, opting for OEM on critical parts like master cylinders, and aftermarket for pads where performance matters.
After any brake work, do a road test in a safe area—pump the pedals hard a few times to seat everything. Stay safe out there, and keep those wheels turning.
FAQ
What should I do first if the red brake light comes on?
Pull over safely, check if the parking brake is engaged, and inspect fluid levels. If low, top up with the right DOT type and look for leaks. I’ve seen many false alarms from simple oversights.
Can I drive with the red brake light on?
Only if brakes feel normal and it’s a short distance to a shop. But don’t risk it—I’ve towed cars where ignoring it led to total brake failure.
How much does it cost to fix a red brake light issue?
Varies: Fluid top-up is free-ish, pads $100-300 DIY, master cylinder $200-500. Shop labor adds $100-200 per hour.
Is it safe to use aftermarket brake parts?
Absolutely, if from reputable brands like Bosch or Raybestos. They’ve performed great in my experience on US vehicles, often with better warranties.
Why does the brake light come on when turning?
Often low fluid sloshing in the reservoir—top it up. Could also be a faulty sensor; get it scanned.
