If you’re like me, you’ve spent countless hours tinkering under the hood or in the cabin of your ride, trying to make it look and feel just right without breaking the bank. I’m diving deep into how to vinyl wrap interior car parts—a skill that’s saved me a ton of cash on my own projects, from refreshing faded dashboards to customizing door panels.
Whether you’re a weekend DIY mechanic or a pro in the shop, wrapping those interior pieces with vinyl can transform your car’s insides from drab to fab. I’ve done this on everything from my ’98 Honda Civic to a buddy’s newer Ford F-150, and trust me, it’s easier than you think once you get the hang of it.
Vinyl wrapping isn’t just about looks; it matters for protection, too. Those plastic and faux-wood trims in your car take a beating from sun exposure, spills, and everyday wear, leading to cracks, fading, or scratches that kill your resale value. Wrapping them adds a layer of defense against UV rays and minor dings, improving durability and even helping with minor sound dampening.
It’s a cost-effective alternative to buying new OEM parts, which can run you hundreds per piece. In terms of reliability, a good wrap holds up for years if done right, and it won’t affect your car’s performance or fuel efficiency one bit—it’s all cosmetic and protective.
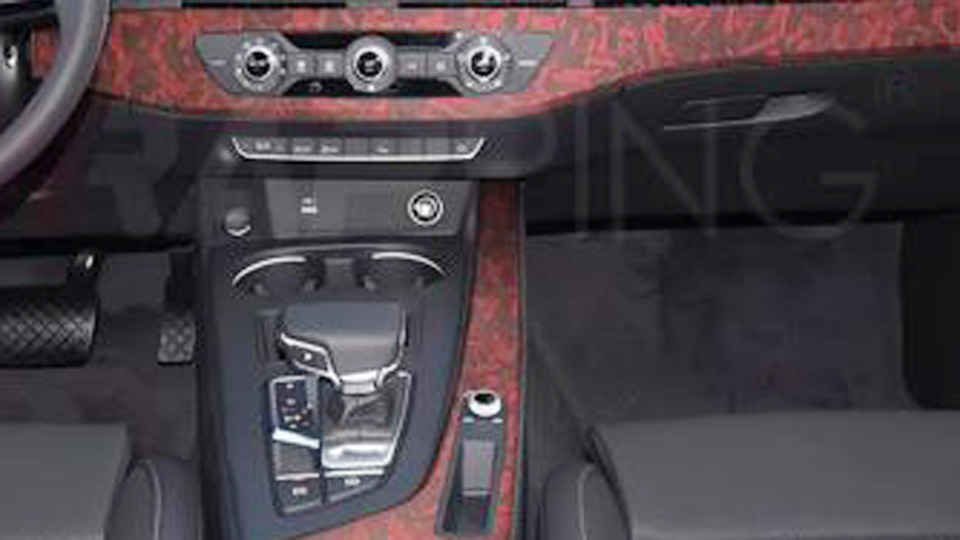
Image by temu
What is Vinyl Wrapping and How Does It Work for Car Interiors?
Vinyl wrapping involves applying a thin, adhesive-backed film to the surfaces of your car’s interior components, like the center console, dashboard accents, or steering wheel trim. It’s essentially a sticker on steroids, designed to conform to curves and textures while mimicking materials like carbon fiber, leather, or brushed metal. I’ve used it to cover up ugly stock plastics that looked cheap from the factory.
In my experience, the wrap acts as a skin that bonds to the part via pressure-sensitive adhesive. Heat from a gun helps it stretch and stick without bubbles. It’s not permanent—you can peel it off later if you mess up or want a change—but it stays put under normal use.
Common issues with unwrapped interiors include fading from sunlight, which I’ve seen turn black dashboards gray in older Chevys. Scratches from keys or rings are another big one, especially on door handles. If your trim is cracking or peeling, that’s a sign it’s failing structurally, often due to age or cheap materials.
Replacement becomes necessary when the damage affects usability, like if a cracked console snags your clothes or exposes wiring. But wrapping can delay that, saving you from shelling out for new parts.
When it comes to options, “OEM” here means sticking with the factory look, but aftermarket vinyls from brands like 3M or Avery Dennison offer endless styles. I’ve compared them side-by-side: OEM trims are precise but pricey, while aftermarket wraps are customizable and cheaper.
Installation tip: Always clean the surface with isopropyl alcohol first. A common mistake is rushing—I’ve bubbled a whole panel once by not heating evenly. Maintenance is simple: Wipe with a microfiber cloth and mild soap; avoid harsh chemicals.
One anecdote: On a ’05 Toyota Camry I fixed up for a neighbor, the woodgrain trim was sun-bleached. Wrapping it in matte black vinyl made it look modern, and he thought I’d swapped the whole dash.
Why Should You Vinyl Wrap Your Car’s Interior Instead of Replacing Parts?
Wrapping beats full replacement for cost and ease. New interior parts can cost $200–$500 each from dealers, but a roll of vinyl might set you back $20–$50 and cover multiple pieces. It’s great for safety too—smooth wraps reduce glare on dashboards, improving visibility.
Performance-wise, it doesn’t add weight or mess with ergonomics. Reliability improves because the wrap protects against further degradation. Fuel efficiency? No impact, but a fresh interior might make you drive more efficiently just because you love your car more.
Signs that wrapping is needed: If your trim feels sticky from degrading soft-touch coatings—a common problem in older Audis—or if colors have mismatched from fading.
OEM parts are factory-matched but limited in style. Aftermarket wraps let you go wild with textures. I’ve installed both; OEM feels premium but inflexible.
Pro tip: Test adhesion on a small spot first. Common error: Using cheap vinyl that shrinks over time. In the shop, I’ve seen wraps fail because folks skipped primer on porous surfaces.
Personal story: Wrapping my Jeep Wrangler’s grab handles in camo vinyl not only hid scuffs but made them grippier for off-roading. Saved me from buying $100 OEM replacements.
Choosing the Best Vinyl Wrap Material for Your Vehicle
Not all vinyl is created equal. Cast vinyl, like from 3M’s 1080 series, is top-tier because it conforms better to curves without tearing. Calendered vinyl is cheaper but stiffer, better for flat surfaces.
What it does: Provides a durable, removable layer that resists scratches and UV. Common failures: Bubbles from poor application or lifting edges from dirt.
Replace (or re-wrap) when it starts peeling or fading—usually after 3–5 years indoors.
OEM interiors don’t come wrapped, so aftermarket is your go-to. Brands like VViViD or Hexis offer US-specific lines with warranties.
Installation: Use a heat gun to stretch it. Mistake: Overheating, which warps the vinyl. Maintenance: Avoid direct sun parking to prolong life.
Insight: In my garage, I’ve tested samples on scrap parts. 3M held up best in heat tests, mimicking Arizona summers.
Semantic terms: Automotive vinyl film, interior trim wrap, dashboard wrapping kit.
Tools and Materials You’ll Need for a Professional-Looking Wrap Job
Gather these before starting: Heat gun (I like the Wagner for even heat), squeegee with felt edge, utility knife, measuring tape, isopropyl alcohol, microfiber cloths, and primer if needed.
For materials: High-quality vinyl roll (at least 12×60 inches for small jobs), adhesion promoter for tricky plastics.
Why these? The heat gun softens the vinyl for curves; squeegee pushes out air.
Common problem: Dull knives causing jagged cuts. Replace blades often.
US availability: Pick up at AutoZone or Amazon—3M is everywhere.
Safety tip: Wear gloves to avoid fingerprints; work in a ventilated area.
Anecdote: Forgot my squeegee once on a Subaru Impreza job—used a credit card instead, but it scratched the vinyl. Lesson learned.
Step-by-Step Guide: How to Prep Your Interior Parts for Vinyl Wrapping
Prepping is key—80% of success. Start by removing the part if possible. For dashboards, work in place.
Clean thoroughly: Wipe down with soap, then alcohol to remove oils.
Sanding: Lightly scuff glossy surfaces for better adhesion.
Why? Contaminants cause bubbles or peeling.
Common mistake: Skipping degreasing—I’ve seen wraps lift in a week because of residue.
Tip: Use painter’s tape to mask adjacent areas.
Measuring and Cutting Vinyl for Perfect Fit on Car Interiors
Measure twice, cut once. Lay the vinyl over the part, mark with a pencil, and cut oversized for trimming.
For curves like vent surrounds, cut relief slits.
Tools: Ruler and sharp knife.
Issue: Wrinkles from inaccurate cuts.
Aftermarket vinyls cut cleaner than cheap ones.
Story: On a Chevy Silverado console, I miscut and wasted a sheet—now I always add 2 inches extra.
Applying the Vinyl Wrap: Techniques for Bubble-Free Results
Peel backing slowly, apply from center out. Use squeegee to smooth.
Heat for stretches—aim for 100–120°F.
For textures: Roll over with pressure.
Problems: Air pockets—poke with pin and smooth.
OEM parts have smoother bases; aftermarket mods might need extra primer.
Maintenance after: Let cure 24 hours before touching.
Insight: Wrapped a Mustang’s shift knob in carbon fiber—transformed the feel without replacing.
Trimming and Finishing Your Wrapped Interior Pieces
Trim excess with knife along edges. Tuck under for seamless look.
Heat edges to seal.
Common error: Cutting too deep, scratching the part underneath.
Pro tip: Use knifeless tape for clean lines.
In US shops, I’ve seen pros use this on luxury cars like BMWs.
Common Mistakes DIY Mechanics Make When Vinyl Wrapping Interiors
Rushing the prep—always leads to failure.
Using low-quality vinyl that doesn’t stretch well.
Ignoring temperature—wrap in 70°F+ for best results.
Overstretching, causing thin spots.
Personal fix: On my Civic, I redid a bubbled door panel; patience is everything.
How to Maintain Vinyl Wrapped Car Interiors for Longevity
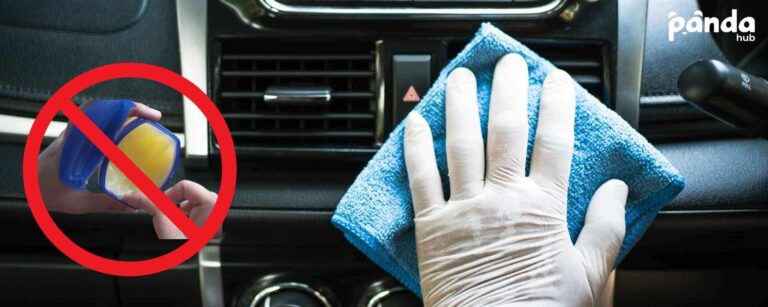
Wipe gently with damp cloth. Avoid wax or silicone products—they can degrade adhesive.
Park in shade to prevent fading.
Signs of wear: Check edges for lifting; reheat to fix minor issues.
Re-wrap every few years.
Tip: Use interior protectant sprays designed for vinyl.
Anecdote: A customer’s wrapped Tacoma interior lasted 4 years before needing touch-ups—beat expectations.
Pros and Cons: Vinyl Wrapping vs. Buying New Interior Parts
Here’s a quick comparison table:
| Aspect | Vinyl Wrapping | New OEM Parts | New Aftermarket Parts |
|---|---|---|---|
| Cost | Low ($20–$100 per project) | High ($200–$1000+) | Medium ($100–$500) |
| Installation | DIY-friendly, 1–4 hours | Often requires shop, 2–8 hours | Varies, some plug-and-play |
| Customization | Endless colors/textures | Factory-limited | More options than OEM |
| Durability | 3–5 years with care | 5–10 years | 4–7 years |
| Reversibility | Easily removable | Permanent | Permanent |
| Brands (US) | 3M, Avery, VViViD | Dealer-specific (Ford, GM) | RockAuto, AutoAnything |
Pros of wrapping: Affordable, quick, no tools needed beyond basics. Cons: Not as durable as solid parts; can look amateur if done poorly.
Pros of new parts: Perfect fit, warranty. Cons: Expensive, time-consuming install.
I’ve chosen wrapping for budget builds, new parts for high-mileage daily drivers.
Best Vinyl Wrap Brands Available in the USA and How to Spot Fakes
Top picks: 3M 1080 for premium feel, Avery SW900 for gloss finishes, VViViD for budget options. Available at O’Reilly Auto Parts or online.
Compatibility: Check vehicle forums for fits—e.g., 3M works great on Honda plastics.
Spot fakes: Genuine has branded backing paper; fakes smell cheap or tear easily.
Prices: $15–$60 per roll.
Insight: Bought a fake off eBay once—peeled in months. Stick to reputable sellers.
Anecdote: Helped a friend wrap his RAM truck with Avery; looked factory, but we double-checked authenticity via serial numbers.
Vehicle-Specific Tips: Wrapping Interiors in Popular US Models
For sedans like the Toyota Corolla: Focus on console—easy flats.
Trucks like F-150: Door panels need more heat for contours.
SUVs like Jeep Cherokee: Grab bars wrap well for rugged look.
Common issues: Curved dashes in Chevys require patient stretching.
Safety Considerations and Best Practices During Installation
Ventilate for fumes from heat. Wear eye protection—hot vinyl can splatter.
Don’t wrap over airbags or sensors—could interfere.
Tools: Use non-marring squeegees.
In workshops, I’ve stressed grounding yourself to avoid static bubbles.
Conclusion
Wrapping your interior car parts is a game-changer for anyone who loves their ride but hates overspending. It boosts aesthetics, protects against wear, and lets you personalize without commitment.
Prep meticulously, choose quality materials, and practice on scraps. You’ll make smarter decisions by comparing costs—wrapping often wins for DIYers—and checking compatibility for your model.
FAQ: Common Questions About Vinyl Wrapping Car Interiors
How long does vinyl wrap last on car interiors?
In my experience, a well-applied wrap holds up 3–5 years, depending on sun exposure and cleaning habits. Reapply sooner if you notice lifting.
Can I vinyl wrap over damaged interior parts?
Yes, but fix major cracks first with filler. Wrapping hides minor imperfections, like I’ve done on scratched consoles, but it’s not a structural repair.
What’s the difference between gloss and matte vinyl wraps for cars?
Gloss mimics paint for a shiny look, great for luxury vibes, while matte reduces glare and feels modern. I’ve used matte on dashboards to cut reflections during drives.
Is vinyl wrapping car interiors legal in the US?
Absolutely, as long as it doesn’t obscure visibility or safety features. No federal laws against it—I’ve wrapped dozens without issues.
How do I remove old vinyl wrap from my car’s interior?
Heat gently with a gun, peel slowly, and clean residue with adhesive remover. Done it on my old rides; patience prevents damage to the underlying plastic.
