You’re driving home from work, and suddenly the brake pedal feels a little softer than usual, maybe even paired with a warning light on the dash. That sinking feeling sets in, because when it comes to brakes, there’s no room for guesswork. One of the simplest things that can cause this is low brake fluid, and knowing how to add brake fluid to your car can make all the difference between a smooth stop and a dangerous situation.
I’ve topped off and flushed brake fluid more times than I can count in my garage, and one mistake I often see car owners make is ignoring that reservoir until it’s bone dry. Brake fluid might seem like just another maintenance item, but trust me—it’s the lifeblood of your braking system, and keeping it at the right level is key to safety, performance, and avoiding expensive repairs down the road.

Image by autoexpro
What Is Brake Fluid and What Does It Do?
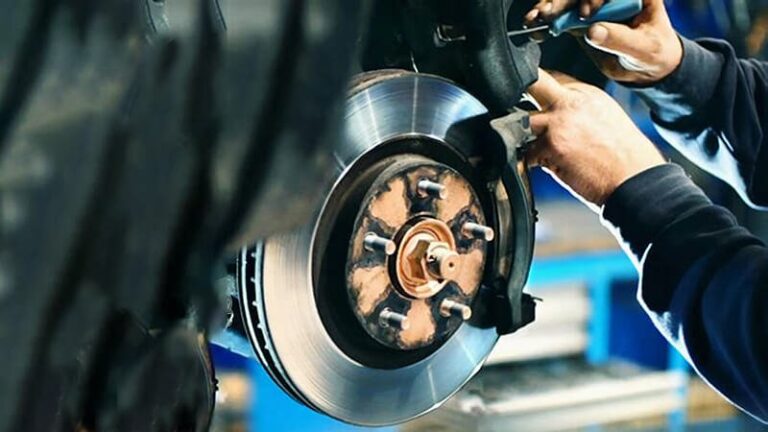
Brake fluid is essentially a hydraulic fluid specially formulated for your car’s braking system. It’s a non-compressible liquid that sits in a closed loop, starting from the master cylinder under your hood and running through lines to the brake calipers or drums at each wheel. When you press the pedal, it pushes this fluid, creating pressure that activates the brakes.
From my experience, think of it like the oil in your engine—it’s vital but often overlooked until something goes wrong. I’ve seen cars come into the shop with contaminated fluid that looked like muddy water, causing all sorts of issues. What it does is simple: transmit force efficiently while resisting heat and moisture. Without it, your brakes wouldn’t work at all.
Common types include DOT 3, DOT 4, and DOT 5, each with different boiling points and compositions. DOT 3 and 4 are glycol-based, great for most daily drivers, while DOT 5 is silicone-based for high-performance or classic cars. In the US, you’ll find these at any AutoZone or O’Reilly’s.
Signs Your Brake Fluid Needs Attention
One of the first red flags is a soft or spongy brake pedal. I’ve felt this in my own Chevy Silverado after a long trip—it’s like stepping on a marshmallow instead of getting that firm response. That usually means air has snuck into the system due to low fluid levels.
Another sign? The brake warning light on your dash. Don’t ignore it; I’ve had customers roll in with that light blazing, only to find their reservoir nearly empty from a slow leak. Noisy brakes, like grinding or squealing, can also point to fluid issues if contamination is wearing down pads unevenly.
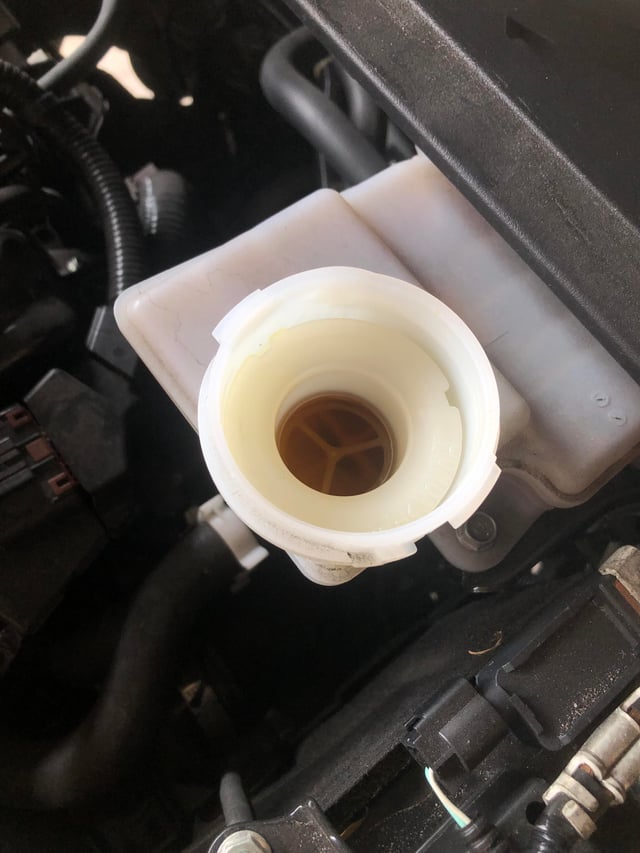
Visually, check the fluid color. Fresh stuff is clear or slightly yellow; if it’s dark brown or black, it’s oxidized and needs changing. I’ve pulled samples from vehicles where the fluid was so dirty it gummed up the ABS sensors, triggering codes.
Leaking fluid under the car is a dead giveaway—puddles near the wheels or master cylinder. And if your brakes feel like they’re fading during hard stops, especially downhill, that’s heat boiling the fluid, reducing its effectiveness.
When and Why You Need to Add or Replace Brake Fluid
You should add brake fluid whenever the level drops below the “min” mark on the reservoir—simple as that. But replacement? Most manufacturers recommend every 2 years or 30,000 miles, whichever comes first. Why? Brake fluid is hygroscopic, meaning it absorbs moisture over time, lowering its boiling point and promoting corrosion.
In my workshop days, I’d see folks neglect this, leading to rusted lines that burst under pressure. Safety is the big why—moist fluid can boil under heavy braking, causing vapor lock and no brakes at all. Performance suffers too; contaminated fluid doesn’t transfer force as well, making stops longer.
Cost-wise, adding a bit is pennies, but a full flush might run $100-200 at a shop. Do it yourself, and you’re saving big. Reliability? Fresh fluid keeps seals supple and prevents expensive part failures like caliper seizures.
For US vehicles, check your owner’s manual—Fords might spec DOT 3, while European imports like BMWs often want DOT 4. I’ve replaced fluid in everything from Jeeps to Toyotas, and timing it right avoids headaches.
Choosing the Right Brake Fluid: DOT 3 vs. DOT 4 vs DOT 5
Picking the correct brake fluid boils down to your car’s specs and driving style. DOT 3 is the most common, glycol-based with a dry boiling point around 401°F. It’s affordable and works for everyday sedans like Hondas or Chevys.
DOT 4 ups the ante with a higher boiling point (446°F dry), better for trucks or performance cars that generate more heat. I’ve used it in my Mustang during track days—holds up without fading.
DOT 5 is silicone-based, non-absorbent of moisture, with even higher temps (500°F+), but it’s not compatible with ABS systems in most modern vehicles. Great for classics or Harleys, though.
In the US market, brands like Prestone (DOT 3/4), Valvoline, or Mobil 1 offer reliable options. Prices? A quart of DOT 3 runs $5-10, DOT 4 $8-15, DOT 5 $15-25 at Walmart or Amazon.
Always match your manual—mixing types can cause seal damage. I’ve seen that mess firsthand: a guy mixed DOT 5 into a DOT 4 system, and the brakes locked up solid.
Here’s a quick comparison table:
| Type | Boiling Point (Dry/Wet) | Best For | Pros | Cons | Average US Price (Quart) |
|---|---|---|---|---|---|
| DOT 3 | 401°F / 284°F | Daily drivers, older cars | Cheap, widely available | Absorbs moisture quickly | $5-10 |
| DOT 4 | 446°F / 311°F | Trucks, performance | Higher heat resistance | Slightly more expensive | $8-15 |
| DOT 5 | 500°F / 356°F | Classics, non-ABS | Doesn’t absorb water | Incompatible with many systems | $15-25 |
OEM vs Aftermarket Brake Fluid Options
OEM brake fluid is what your carmaker recommends—think Ford Motorcraft or GM’s own blend. It’s formulated exactly for your vehicle, ensuring compatibility and warranty compliance. I’ve used OEM in warranty jobs to avoid voiding coverage.
Aftermarket? Brands like ATE, Pentosin, or Castrol offer equivalents that often meet or exceed specs at lower cost. For a Toyota Camry, OEM might cost $12/quart, while Prestone aftermarket is $7.
Pros of OEM: Guaranteed fit, no surprises. Cons: Pricier, harder to find outside dealers.
Aftermarket pros: Cheaper, easier access at parts stores. Cons: Quality varies—stick to reputable names to avoid fakes.
In the US, for compatibility, check labels for “meets FMVSS 116” standards. I’ve compared them in flushes; aftermarket performs just as well in most cases, saving money without sacrificing safety.
To spot genuine vs. fake: Look for sealed caps, holograms on premium brands, and buy from trusted retailers like NAPA or Advance Auto. Fakes often have misspelled labels or watery consistency—I’ve tested knockoffs that boiled too low, risking failure.
Step-by-Step Guide: Adding Brake Fluid Safely
Alright, let’s get hands-on. First, park on level ground, engine off, and let it cool. Pop the hood and locate the brake fluid reservoir—usually a translucent plastic tank near the firewall, labeled “brake fluid.”
Check the level: It should be between min and max. If low, wipe the cap clean to avoid dirt ingress—that’s a common mistake I’ve seen ruin systems.
Choose your fluid—match the type on the cap (DOT 3, etc.). Open a fresh bottle; never reuse old fluid.
Slowly pour in until it reaches max, using a funnel to avoid spills. Brake fluid eats paint, so wipe any drips immediately with a rag.
Replace the cap securely, start the engine, and pump the brakes a few times to settle the level. Recheck and add if needed.
Safety tip: Wear gloves and eye protection—fluid is corrosive. If you spill on skin, rinse with water.
For a full flush, you’ll need a helper to pump the pedal while you bleed lines at each wheel, starting from the farthest (passenger rear). I’ve done this solo with a one-man bleeder kit from Harbor Freight—works great.
Common tools: Funnel ($2), rags, gloves, maybe a turkey baster for sucking out old fluid first.
Common Mistakes and How to Avoid Them
Biggest blunder? Mixing fluid types—leads to gelling and seal failure. Always flush if switching.
Overfilling: Causes leaks when hot. Stick to max line.
Ignoring contamination: If fluid’s dirty, adding more won’t fix it—flush the system.
Not bleeding air: After adding, if pedals spongy, bleed the lines. I’ve fixed many “soft brake” complaints this way.
Rushing without safety: Work in a ventilated area; fluid fumes are nasty.
Personal insight: Once, a customer added washer fluid by mistake—total disaster, had to replace everything. Double-check labels!
Tools and Safety for Brake Fluid Maintenance
Basic toolkit: Phillips screwdriver for some caps, funnel, rags, gloves, safety glasses. For flushes, a bleeder wrench (8-10mm), clear tubing, and catch bottle.
Advanced? A pressure bleeder like Motive’s ($50) makes jobs faster.
Safety first: Chock wheels, use jack stands if under the car. Ventilate—fumes can cause headaches.
In US stores, grab these at Pep Boys or online from RockAuto.
Maintenance best practices: Check levels monthly, flush every 2 years. Store fluid sealed; it absorbs moisture from air.
Real-Life Brake Fluid Fixes
Back in my shop days, a guy brought in his Dodge Ram with fading brakes. Fluid was black as coffee—hadn’t been changed in years. We flushed it with fresh DOT 4, and it stopped like new. He was towing heavy loads; that heat was killing the old stuff.
Another time, on my personal Jeep Wrangler, I noticed a slow leak from a caliper seal. Topped off weekly until I could replace it—saved me from a breakdown on a trail.
Customers often ask, “Can I just add instead of flush?” Sure, for minor top-offs, but not long-term. I’ve educated dozens on this.
One funny one: A kid thought brake fluid was like oil, dipped a stick in—contaminated the whole reservoir. Lesson learned: Keep it clean.
These experiences taught me: Prevention beats cure. Regular checks avoid big bills.
Keeping Your Brake System Reliable Long-Term
Beyond adding fluid, inspect lines for cracks, pads for wear. I’ve seen corroded lines on salted Northeast roads—replace with stainless for longevity.
Test boiling point with strips from kits ($10). If low, flush.
For fuel efficiency, good brakes mean less drag from worn components.
US-specific: In hot states like Arizona, use higher-spec fluid to combat heat. Cold areas? Ensure it’s not freezing.
Pair with other maintenance: Rotate tires, check rotors.
Conclusion
Wrapping this up, adding brake fluid to your car is a straightforward task that pays off in safety, performance, and savings. By understanding what it does, spotting issues early, and choosing quality options—whether OEM or trusted aftermarket—you’ll keep your ride stopping strong.
Make smarter decisions by always consulting your manual, buying from reputable US sources like AutoZone, and never skimping on flushes. One final pro tip: After any brake work, bed in new pads with gentle stops to avoid glazing—I’ve seen it extend pad life by 20%. Stay safe out there, and happy wrenching!
How Often Should I Check My Brake Fluid Level?
Aim for monthly checks or before long trips. It’s quick—pop the hood and glance at the reservoir. If low frequently, inspect for leaks; I’ve caught many caliper issues this way early.
What’s the Difference Between Brake Fluid and Power Steering Fluid?
Brake fluid is for hydraulics in brakes, while power steering fluid lubricates that system. They’re not interchangeable—using the wrong one ruins seals. Always check labels; a mix-up once cost me a full steering rack rebuild.
Can Low Brake Fluid Cause My ABS Light to Come On?
Yes, often. Low levels trigger sensors, lighting up the dash. Top off and bleed if needed; if the light stays, scan for codes. In my experience, 70% of ABS issues tie back to fluid problems.
Is It Safe to Drive with Low Brake Fluid?
Not really—reduced braking power is a hazard. Pull over, add fluid, and get it checked. I’ve towed cars where owners ignored this, leading to near-misses.
How Do I Know If My Brake Fluid Is Contaminated?
Color and consistency: Dark or milky means water or dirt. Test with a hygrometer or visually. If in doubt, flush—better safe than sorry on the road.


