If your car headlights have turned cloudy or yellowed over time, you’ve probably noticed how much it affects nighttime visibility. A simple, budget-friendly way to restore them is using baking soda—a household item that works surprisingly well on oxidation and grime. I’ve cleaned more headlights than I can count in my garage, and the trick is knowing the right technique so you don’t scratch the plastic.
Baking soda, combined with a little water, creates a mild abrasive paste that buffs away the dull layer, leaving your headlights clearer and brighter. I’ll walk you through the step-by-step process to safely clean your headlights, improve your car’s appearance, and boost night driving safety without spending a fortune on commercial products.
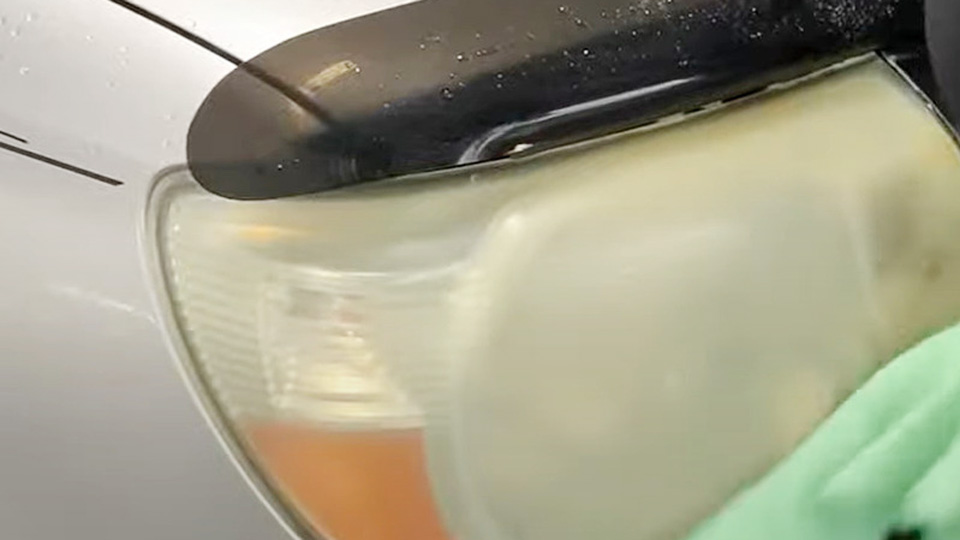
Image by slashgear
Why Headlight Clarity Matters
Headlights aren’t just about aesthetics—they’re critical for safety. Cloudy headlights reduce light output, making it harder to see at night or in bad weather. According to the AAA, hazy headlights can cut visibility by up to 80%. That’s a scary thought when you’re cruising down a dark road.
Clear headlights also improve your car’s resale value and make it look well-maintained. Plus, replacing headlights can cost $100–$1,000 depending on the vehicle, so cleaning them with baking soda (which costs about $1) is a no-brainer for saving cash.
What Causes Cloudy Headlights?
Understanding Headlight Construction
Modern headlights are made of polycarbonate plastic, not glass like older models. This plastic is tough but prone to oxidation from UV rays, road grime, and environmental gunk. Think of it like your car’s skin—it takes a beating from the sun, salt, and debris. The protective UV coating on headlights wears off, leaving them foggy, yellowed, or scratched.
Common Problems and Signs of Failure
I’ve seen headlights so cloudy they looked like frosted glass. Common signs include:
- Fogginess or haze: Light output is dim, even with new bulbs.
- Yellowing: The plastic takes on a yellowish tint, reducing clarity.
- Scratches or pitting: Small abrasions from road debris weaken light projection.
- Diminished night vision: You’re squinting to see the road, or oncoming drivers flash their lights at you.
If your headlights are dim, it’s not always the bulb—90% of the time, it’s the lens itself. I once had a customer with a 2015 Toyota Camry who swore her bulbs were bad. A quick baking soda scrub proved otherwise, and she was back on the road for under $5.
When to Clean or Replace Headlights
Clean your headlights if they’re mildly to moderately cloudy or yellowed. Baking soda works best for surface-level oxidation and light scratches. If the lens is cracked, heavily pitted, or damaged inside (like moisture buildup), cleaning won’t cut it—you’ll need a replacement. Most headlights last 5–10 years before serious degradation, but regular cleaning can extend their life.
How to Clean Car Headlights with Baking Soda: Step-by-Step Guide
Tools and Materials You’ll Need
Before we dive in, grab these from your garage or local auto store:
- Baking soda (Arm & Hammer is my go-to, about $1 at Walmart)
- White vinegar (optional, for tougher grime)
- Microfiber cloths or soft sponges
- A bucket or bowl of warm water
- Painter’s tape (to protect your car’s paint)
- Spray bottle (optional, for vinegar application)
- Gloves (to keep your hands clean)
- Optional: Headlight restoration kit (like 3M or Meguiar’s, $15–$30) for deeper scratches
Step-by-Step Cleaning Process
Here’s how I clean headlights in my shop, and it works like a charm:
Prep the Area: Park your car in a shaded spot. Wash the headlights with soap and water to remove dirt. Dry with a microfiber cloth. Tape off the surrounding paint with painter’s tape to avoid scratches.
Make the Baking Soda Paste: Mix 2 tablespoons of baking soda with 1 tablespoon of warm water in a bowl. You want a thick, gritty paste—think toothpaste consistency. If it’s too runny, add more baking soda.
Apply the Paste: Dip a microfiber cloth or sponge into the paste and rub it onto the headlight in circular motions. Apply medium pressure, like you’re scrubbing a stubborn pot. Focus on cloudy or yellowed areas. I’ve found that spending 2–3 minutes per headlight does the trick.
Add Vinegar for Extra Power (Optional): For stubborn haze, spritz white vinegar onto the paste while scrubbing. The chemical reaction between baking soda and vinegar creates a fizzing action that lifts grime. I used this on a 2008 Chevy Silverado with rock-hard oxidation, and it worked in under 10 minutes.
Rinse and Inspect: Rinse the headlight with clean water. Dry with a microfiber cloth and check for clarity. If it’s still hazy, repeat the process or use a finer abrasive (like a headlight restoration kit).
Polish (Optional): For a showroom shine, apply a car wax or headlight sealant (like Turtle Wax Headlight Restorer, $10 at AutoZone). This adds a protective layer against future oxidation.
Test the Headlights: Turn on your headlights to check brightness. Compare them to how they looked before. You’ll likely be amazed at the difference.
Common Mistakes to Avoid
- Using too much water: A runny paste won’t scrub effectively. Keep it thick.
- Scrubbing too hard: Polycarbonate scratches easily. Use gentle, circular motions.
- Skipping the tape: Baking soda paste can scratch your car’s paint if you’re sloppy.
- Ignoring deep damage: If the lens is pitted or cracked, baking soda won’t fix it. Know when to replace.
OEM vs Aftermarket Headlights: What’s the Difference?
If cleaning doesn’t restore your headlights, you might need replacements. Here’s a breakdown of OEM (original equipment manufacturer) vs aftermarket options, based on my experience installing both.
OEM Headlights
- What They Are: Made by the same manufacturer as your car’s original headlights (e.g., Ford, Toyota, or GM-approved suppliers like Koito or Hella).
- Pros:
- Perfect fit and compatibility.
- High-quality materials with UV coatings.
- Often come with warranties (1–2 years).
- Maintain resale value for high-end vehicles.
- Cons:
- Expensive ($100–$1,000 per headlight, depending on the car).
- Limited availability for older models.
- Best For: Late-model cars, luxury vehicles, or if you’re a stickler for factory specs.
Aftermarket Headlights
- What They Are: Made by third-party brands like DEPO, TYC, or Anzo. Available at places like AutoZone, Amazon, or RockAuto.
- Pros:
- Affordable ($50–$300 per headlight).
- Wide availability for most makes and models.
- Often include modern features like LED upgrades.
- Cons:
- Fitment can be hit-or-miss (I’ve had to shim aftermarket lights on a 2012 Dodge Ram).
- Quality varies—some lack proper UV coatings.
- May not last as long as OEM.
- Best For: Budget-conscious owners or older vehicles where OEM parts are scarce.
Comparison Table: OEM vs. Aftermarket Headlights
| Feature | OEM Headlights | Aftermarket Headlights |
|---|---|---|
| Price | $100–$1,000 | $50–$300 |
| Fitment | Perfect | Variable, may need adjustments |
| Durability | 5–10 years | 3–7 years |
| Warranty | 1–2 years | 6 months–1 year |
| Availability | Limited for older models | Widely available |
| UV Protection | High-quality coatings | Varies by brand |
For a daily driver like a 2010 Honda Accord, aftermarket headlights from a reputable brand like TYC are fine. For a BMW or Mercedes, stick with OEM to avoid fitment issues. Always check reviews and buy from trusted retailers like RockAuto or Advance Auto Parts.
How to Spot Genuine vs. Fake Headlights
Counterfeit headlights are a real problem, especially online. I once ordered what I thought was an OEM headlight for a 2014 Jeep Wrangler, only to find it was a knockoff that leaked after a month. Here’s how to avoid fakes:
Check the Packaging: OEM parts come in branded boxes with holograms or serial numbers. Aftermarket brands like DEPO have clear labeling too.
Inspect the Build: Genuine headlights have clean seams, sturdy mounts, and clear lenses. Fakes often feel flimsy or have misaligned logos.
Buy from Reputable Sources: Stick to AutoZone, Advance Auto Parts, or RockAuto. Avoid sketchy eBay sellers or Amazon listings with no reviews.
Verify Part Numbers: Cross-check the part number with your vehicle’s manual or a dealership. OEM numbers match exactly; fakes often don’t.
Look for Certifications: Genuine headlights have DOT (Department of Transportation) or SAE (Society of Automotive Engineers) markings.
Maintenance Tips to Keep Headlights Clear
Once your headlights are sparkling, you want them to stay that way. Here’s what I tell customers in the shop:
- Apply a UV Sealant: Use a headlight restoration kit with a sealant (like Meguiar’s, $25) every 6–12 months.
- Wash Regularly: Clean headlights with car soap weekly to prevent grime buildup.
- Park in the Shade: UV rays are the enemy. A garage or carport extends headlight life.
- Avoid Harsh Chemicals: Don’t use abrasive cleaners like acetone—it’ll ruin the lens.
- Check Alignment: Misaligned headlights reduce visibility. Most shops can adjust them for $20–$50.
I learned this the hard way with my old ’05 Subaru Outback. I parked it in direct sunlight for years, and the headlights yellowed faster than Usain Bolt running the 100-meter. A quick baking soda scrub and a UV sealant saved me from buying new ones.
Headlight Restoration Kits vs. Baking Soda: Which Is Better?
Baking soda is great for light haze, but what about tougher cases? I’ve used both baking soda and professional kits like 3M and Sylvania in the shop. Here’s a quick comparison:
Baking Soda
- Cost: ~$1
- Best For: Light oxidation, yellowing
- Time: 10–15 minutes
- Pros: Cheap, readily available, no special tools needed
- Cons: Less effective for deep scratches or heavy pitting
Headlight Restoration Kits
- Cost: $15–$30 (3M, Sylvania, Meguiar’s)
- Best For: Moderate to heavy oxidation, scratches
- Time: 30–60 minutes
- Pros: Includes sanding pads, polish, and sealant for lasting results
- Cons: More expensive, requires careful technique
My Recommendation: Start with baking soda. If the haze doesn’t budge, grab a restoration kit. For a 2007 Ford F-150 I worked on last month, baking soda got me 80% of the way, but a 3M kit finished the job for showroom-quality results.
Safety Tips for DIY Headlight Cleaning
Working on your car is rewarding, but safety comes first:
- Wear Gloves: Baking soda paste can dry out your skin.
- Work in a Ventilated Area: Vinegar fumes can be strong.
- Protect Your Paint: Always tape off the surrounding area.
- Test Headlights After Cleaning: Ensure they’re aimed correctly to avoid blinding other drivers.
- Don’t Over-Sand: If using a restoration kit, start with a high-grit sandpaper (e.g., 1000) to avoid scratches.
Real-World Anecdote: The Customer Who Learned the Hard Way
Last summer, a guy brought his 2013 Nissan Altima into my shop. He’d tried cleaning his headlights with toothpaste (a common DIY hack) but ended up with micro-scratches that made the haze worse. I showed him the baking soda trick, and within 15 minutes, his headlights were nearly crystal-clear. He was thrilled to save $200 on new headlights. Moral of the story? Stick to proven methods like baking soda or a quality restoration kit, and don’t believe every hack you see online.
Keep Your Headlights Shining Bright
Cleaning your car headlights with baking soda is a quick, affordable way to boost safety, improve your car’s look, and save money. It’s a trick I’ve used countless times in the shop, and it works on nearly every vehicle, from a rusty pickup to a shiny sedan. By following the steps above, you can restore your headlights in under 20 minutes with stuff you probably already have at home.
If baking soda doesn’t cut it, consider a restoration kit or, in worst-case scenarios, replacement headlights. Choose OEM for premium vehicles or reliable aftermarket brands for budget-friendly options.
Apply a UV sealant after cleaning to keep your headlights clear for years. Now grab that baking soda and get to work—your car will thank you.
FAQ: Common Headlight Cleaning Questions
Can I Use Toothpaste Instead of Baking Soda to Clean Headlights?
Toothpaste can work for light haze, but it’s less effective than baking soda and can leave micro-scratches. I’ve seen it go wrong on a customer’s Nissan Altima. Stick with baking soda or a restoration kit for better results.
How Often Should I Clean My Headlights?
Clean them every 6–12 months, depending on sun exposure and driving conditions. If you live in a sunny state like Florida or Arizona, lean toward every 6 months.
Will Baking Soda Damage My Headlights?
Not if you use it correctly. Keep the paste thick, use gentle pressure, and rinse thoroughly. Over-scrubbing or skipping the painter’s tape can cause issues.
Can I Use Baking Soda on LED Headlights?
Yes, baking soda works on both halogen and LED headlight lenses, as they’re usually polycarbonate. Just be gentle to avoid scratching the lens.
What’s the Best Headlight Restoration Kit in the USA?
I recommend 3M or Meguiar’s kits (available at AutoZone or Amazon for $15–$30). They include sanding pads, polish, and sealant for professional results.
