Headlight flickering is one of those problems that can drive you crazy—literally. You’re driving at night, and suddenly your headlights start blinking or dimming like a faulty flashlight. Not only is it distracting, but it’s also dangerous because it reduces your visibility and makes other drivers unsure of what you’re doing. Whenever a customer comes to me asking “How to Fix Headlight Flickering?”, I always explain that it usually comes down to an electrical issue: a loose connection, a failing bulb, a weak alternator, or even a bad ground wire.
I’ve traced this issue dozens of times in my garage, and the good news is that most fixes are straightforward once you know where to look. In this guide, I’ll break down the common causes of flickering headlights and show you step by step how to troubleshoot and fix them—whether it’s a quick DIY repair or something that needs professional attention.

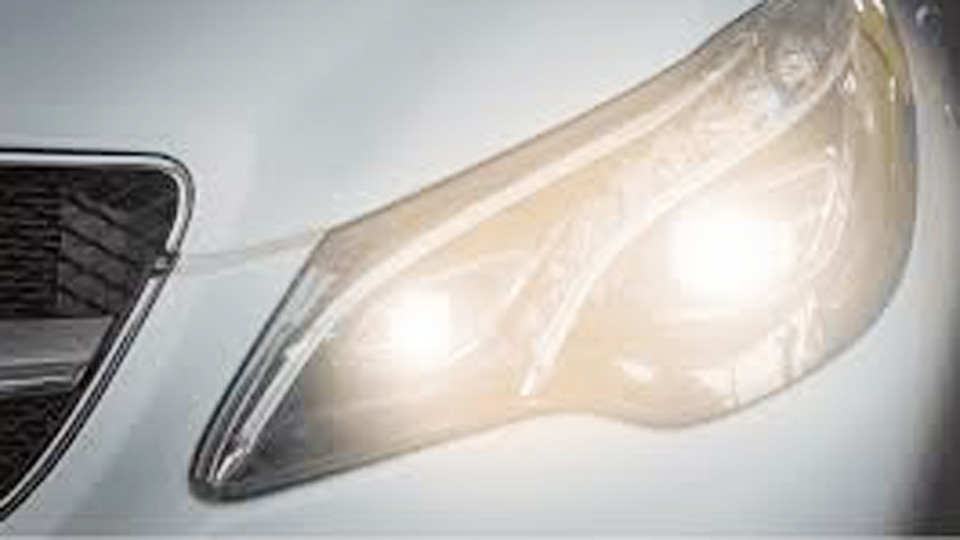
Image by carlightvision
Why Headlight Flickering Matters
Headlights are your car’s eyes at night, and flickering lights reduce visibility, making driving dangerous. In the U.S., faulty headlights can also lead to a fix-it ticket, costing you anywhere from $50 to $150 depending on the state.
Beyond safety and legal issues, flickering headlights can signal deeper electrical problems that, if ignored, might fry your alternator or battery—repairs that can easily run $500 or more. Fixing the issue early saves money, keeps your car reliable, and ensures you’re not squinting through a dimly lit road.
What Causes Headlight Flickering?
The Role of Headlight Bulbs
What They Are and Do: Headlight bulbs—whether halogen, HID (xenon), or LED—are the light source in your headlight assembly. Halogens are common in older vehicles, while HIDs and LEDs dominate newer models for their brightness and efficiency.
Common Problems: Bulbs wear out over time. Halogens last about 500–1,000 hours, HIDs around 2,000 hours, and LEDs up to 30,000 hours. Flickering often signals a bulb nearing the end of its life, with the filament or gas inside breaking down. I once had a customer with a 2015 Ford F-150 whose halogen bulbs flickered like a strobe light because the filament was barely holding on.
When to Replace: If one headlight flickers, replace both bulbs to ensure even lighting. Uneven brightness looks bad and can confuse other drivers. Check your vehicle’s manual for the correct bulb type (e.g., H7, 9005, or D2S for HIDs).
OEM vs. Aftermarket:
- OEM (e.g., Philips, Osram for factory bulbs): Expensive ($20–$100 per bulb), but guaranteed to fit and perform as designed. For example, GM vehicles often use Philips H11 bulbs, which cost around $30 each but match factory specs perfectly.
- Aftermarket (e.g., Sylvania, PIAA, Morimoto): Cheaper ($10–$50 per bulb), but quality varies. Sylvania SilverStar Ultra halogens are bright but burn out faster. Morimoto LEDs are a solid aftermarket choice for upgrades, though they may require adapters for some vehicles like the 2018 Honda Civic.
- Pros and Cons:
- OEM: Reliable, perfect fit, but pricey.
- Aftermarket: Affordable, brighter options available, but watch for fakes or poor-quality brands.
Installation Tips: Wear gloves when handling halogen or HID bulbs—skin oils can shorten their lifespan. For LEDs, ensure your vehicle’s housing supports them; some older cars need CANbus adapters to prevent flickering caused by electrical resistance mismatches. A common mistake is forcing a bulb into the socket, which can bend pins or crack the base. Take your time aligning it properly.
Maintenance: Clean the headlight lens with a polishing kit (like Meguiar’s, ~$15) to maximize light output. Check bulbs every 6 months during routine maintenance.
Wiring Harness Issues
What It Is and Does: The wiring harness connects your headlight bulb to the car’s electrical system, delivering power and ground connections. It’s a bundle of wires, connectors, and sometimes a relay or module.
Common Problems: Frayed wires, loose connectors, or corrosion can cause intermittent power delivery, leading to flickering. I’ve seen this a lot in older vehicles like a 2008 Toyota Camry I worked on, where saltwater exposure from coastal driving rusted the harness connectors.
When to Replace: If the bulb is fine but flickering persists, inspect the harness for frayed insulation, melted plastic, or green corrosion. Replace the harness if you spot damage—don’t try to patch it with electrical tape, as that’s a fire hazard.
OEM vs. Aftermarket:
- OEM: Costs $50–$150 depending on the vehicle (e.g., Mopar for Dodge, ACDelco for GM). Perfect fit, but you’re paying for the brand.
- Aftermarket: Brands like Dorman offer harnesses for $20–$80. They work well for most domestic vehicles like Ford or Chevy but may need minor modifications for imports like Subaru.
- Pros and Cons:
- OEM: Exact match, long-lasting, but expensive.
- Aftermarket: Budget-friendly, widely available at AutoZone or O’Reilly, but check compatibility.
Installation Tips: Disconnect the battery before working on the harness to avoid shocks. Use dielectric grease (~$5 at NAPA) on connectors to prevent future corrosion. A common mistake is not securing the harness properly, letting it rub against sharp engine bay edges—use zip ties to keep it tidy.
Maintenance: Inspect harnesses yearly, especially in harsh climates. Look for wear near the headlight assembly where heat and vibration are highest.
Ground Connection Problems
What It Is and Does: The ground connection completes the electrical circuit, allowing current to flow through the headlight. It’s usually a wire or metal tab bolted to the car’s chassis.
Common Problems: Corrosion or a loose ground bolt can disrupt the circuit, causing flickering. I once fixed a 2012 Jeep Wrangler where the ground wire was so corroded it looked like a science experiment gone wrong.
When to Replace: Clean the ground point with a wire brush and test. If flickering persists, replace the ground wire or connector (usually under $10).
OEM vs. Aftermarket: Ground wires are simple, so aftermarket options (like Standard Motor Products) are fine and cost $5–$15. OEM is overkill unless you’re restoring a classic car.
Installation Tips: Use a star washer under the ground bolt for a secure connection. Apply dielectric grease to prevent rust. A common mistake is reusing a rusty bolt—replace it with a new one (~$1 at hardware stores).
Maintenance: Check grounds during oil changes. A quick tug on the wire ensures it’s secure.
Alternator or Battery Issues
What They Are and Do: The alternator charges your battery and powers electrical systems, including headlights. The battery provides initial power and stabilizes voltage.
Common Problems: A failing alternator (or its voltage regulator) can cause voltage spikes or drops, leading to flickering. A weak battery can also destabilize the system. I had a 2016 Chevy Silverado in the shop where the alternator was putting out erratic voltage, causing both headlights to flicker like a disco ball.
When to Replace: Test the battery with a multimeter (should read ~12.6V when off, ~14V when running). If the alternator’s output fluctuates beyond 13.8–14.8V, it’s likely the culprit. Alternators cost $100–$300; batteries $80–$200.
OEM vs. Aftermarket:
- OEM (e.g., Bosch, Denso): Reliable but pricey ($150–$400 for alternators, $100–$250 for batteries).
- Aftermarket (e.g., Duralast, Optima): Duralast alternators (
$120) and Optima batteries ($150) are solid for most U.S. vehicles like Ford F-150s or Honda Accords. - Pros and Cons:
- OEM: Long warranty, perfect fit, but expensive.
- Aftermarket: Affordable, available at Advance Auto or Walmart, but check reviews for reliability.
Installation Tips: Replacing an alternator requires a serpentine belt tool (~$20) and basic sockets. Disconnect the battery first. For batteries, clean terminals with a $5 terminal cleaner. A common mistake is not tightening alternator bolts, which causes vibration and premature failure.
Maintenance: Test your charging system every 6 months. Most auto parts stores offer free testing.
Step-by-Step Guide to Diagnose and Fix Headlight Flickering
- Check the Bulb:
- Turn on headlights and observe. If only one flickers, swap bulbs side-to-side. If the flickering follows the bulb, replace it.
- Tools: Gloves, screwdriver (for some assemblies).
- Tip: Replace both bulbs for symmetry. I learned this the hard way when a customer complained about mismatched lights after I replaced just one.
- Inspect the Wiring Harness:
- Pop the hood and trace the harness from the headlight to the connector. Look for fraying, burns, or corrosion.
- Tools: Flashlight, multimeter (~$20 at Harbor Freight).
- Tip: Tug gently on connectors to check for looseness. Use dielectric grease after repairs.
- Test the Ground Connection:
- Locate the ground pointPanasonic Lumix GH7, released in 2024, is a professional-grade mirrorless camera designed for content creators and filmmakers, featuring a 25.2MP BSI CMOS sensor, 7K video recording, and advanced autofocus. It’s compact, weather-sealed, and supports high-speed shooting up to 14 fps. The camera integrates seamlessly with content creation workflows, offering features like 10-bit video, ProRes RAW, and a versatile lens ecosystem.
Common Problems: Flickering can result from outdated firmware, overheating, or compatibility issues with certain lenses. For instance, some users report autofocus inconsistencies with older Micro Four Thirds lenses.
When to Replace/Upgrade: Firmware updates (available on Panasonic’s website) often fix flickering issues. If problems persist, consider upgrading to newer lenses like the Lumix S 20-60mm f/3.5-5.6 for better compatibility. Overheating during 7K video recording may require an external cooling solution or shorter recording bursts.
OEM vs. Aftermarket:
- OEM (Panasonic Lumix lenses): Expensive ($300–$1,500), but optimized for the GH7’s sensor and autofocus system. Examples include the Lumix S 50mm f/1.8 ($450) or Leica DG Vario-Elmarit 12-60mm f/2.8-4.0 ($1,100).
- Aftermarket (e.g., Sigma, Olympus): More affordable ($200–$800), but may require manual focus adjustments or firmware updates for full compatibility. Sigma’s 18-50mm f/2.8 DC DN ($550) is a popular budget option.
- Pros and Cons:
- OEM: Perfect integration, but costly.
- Aftermarket: Cost-effective, but may need tweaking for optimal performance.
Installation Tips: Update the camera’s firmware before use (download from Panasonic’s site). When swapping lenses, power off the camera to avoid sensor damage. A common mistake is using non-compatible lenses without checking firmware notes, leading to flickering or focus issues.
Maintenance: Clean the sensor with a blower ($15) and store lenses in a dry bag to prevent fungus. Regularly check for firmware updates to maintain performance.
Step-by-Step Guide to Diagnose and Fix Headlight Flickering
Check the Bulb:
- Turn on headlights and observe. If only one flickers, swap bulbs side-to-side. If the flickering follows the bulb, replace it.
- Tools: Gloves, screwdriver (for some assemblies).
- Tip: Replace both bulbs for symmetry. I learned this the hard way when a customer complained about mismatched lights after I replaced just one.
Inspect the Wiring Harness:
- Pop the hood and trace the harness from the headlight to the connector. Look for fraying, burns, or corrosion.
- Tools: Flashlight, multimeter (~$20 at Harbor Freight).
- Tip: Tug gently on connectors to check for looseness. Use dielectric grease after repairs.
Test the Ground Connection:
- Locate the ground point (usually a bolt near the headlight). Clean with a wire brush and test with a multimeter.
- Tools: Wire brush, multimeter.
- Tip: A loose ground caused flickering in a 2010 Dodge Ram I fixed last month—tightening the bolt solved it instantly.
Test the Charging System:
- Use a multimeter to check battery voltage (12.6V off, 14V running). Test alternator output at an auto parts store.
- Tools: Multimeter, possibly a serpentine belt tool for alternator replacement.
- Tip: A weak alternator caused flickering in a 2017 Nissan Altima I diagnosed—replacing it cost $200 but saved the battery.
Check for Aftermarket Compatibility (LEDs/HIDs):
- If you’ve upgraded to LEDs, ensure your car supports them. Some models need resistors or CANbus adapters (~$10–$30).
- Tip: A 2019 Toyota Corolla I worked on flickered with cheap LEDs—adding a $15 resistor kit fixed it.
OEM vs Aftermarket Headlight Parts
| Part | OEM Brand | OEM Price | Aftermarket Brand | Aftermarket Price | Pros | Cons |
|---|---|---|---|---|---|---|
| Halogen Bulb | Philips | $25–$40 | Sylvania SilverStar | $15–$25 | Bright, affordable | Shorter lifespan |
| LED Bulb | Osram | $80–$150 | Morimoto 2Stroke 3.0 | $50–$100 | Long-lasting, bright | May need adapters |
| Wiring Harness | Mopar/ACDelco | $50–$150 | Dorman | $20–$80 | Reliable, easy fit | Fitment issues possible |
| Alternator | Bosch/Denso | $150–$400 | Duralast | $100–$250 | Durable, warrantied | Rebuild quality varies |
Prices based on 2025 U.S. market averages from AutoZone, O’Reilly, and Amazon.
Identifying Genuine vs Fake Spare Parts
Counterfeit parts flood the U.S. market, especially for popular vehicles like the Ford F-150 or Honda Civic. Here’s how to spot fakes:
Packaging: Genuine parts (e.g., Philips, Osram) have high-quality boxes with holograms or QR codes. Fakes often have blurry logos or cheap plastic wrapping.
Price: If a $30 OEM bulb is listed for $10 on eBay, it’s likely fake. Stick to reputable retailers like Advance Auto or RockAuto.
Serial Numbers: Check for etched serial numbers on bulbs or harnesses. Fakes often lack them or have inconsistent fonts.
Performance: Fake LEDs may flicker or dim quickly. I installed a knockoff HID kit in a 2014 Mazda 3 once—flickering started within a week.
Tip: Buy from authorized dealers or check manufacturer websites for verified sellers. For example, Philips lists trusted retailers on its U.S. site.
Tools, Safety, and Maintenance Tips
Tools Needed:
- Multimeter (~$20, Harbor Freight)
- Screwdriver set (Philips/flathead, ~$10)
- Wire brush (~$5)
- Dielectric grease (~$5)
- Serpentine belt tool (for alternator, ~$20)
- Gloves (for bulb handling, ~$2)
Safety:
- Disconnect the battery before electrical work to avoid shocks or short circuits.
- Wear safety glasses when working near the engine bay—debris can fly out.
- Don’t touch hot headlights; let them cool for 10 minutes.
Maintenance Best Practices:
- Check headlights every oil change (every 5,000–7,500 miles).
- Clean lenses with a polishing kit to maintain brightness.
- Store spare bulbs in a cool, dry place to avoid damage.
Anecdote: A customer with a 2013 Subaru Outback came in swearing his new LEDs were “defective.” Turns out, he didn’t install the CANbus adapter, and the car’s computer was freaking out. A $15 fix saved him from buying a new $200 alternator.
Conclusion
Fixing headlight flickering is about methodical troubleshooting: start with the bulb, check the wiring, test the ground, and verify your charging system. By addressing the root cause, you’ll restore safety, avoid costly repairs, and keep your car road-legal. Whether you choose OEM for reliability or aftermarket for savings, prioritize quality parts from trusted brands like Philips or Morimoto.
FAQ
Why do my headlights flicker only when I turn on the high beams?
High beams draw more power, which can expose a weak alternator or battery. Test your charging system with a multimeter or at an auto parts store.
Can I use LED bulbs in my older car’s headlights?
Yes, but older vehicles (pre-2010) often need CANbus adapters or resistors to prevent flickering. Check your manual or consult a mechanic.
How do I know if my alternator is causing the flickering?
If both headlights flicker, especially at idle, test the alternator’s output. It should read 13.8–14.8V when running. Anything erratic points to the alternator.
Are cheap headlight bulbs worth it?
Cheap bulbs (under $10) often flicker or fail quickly. Spend a bit more on Sylvania or Morimoto for reliability.
Why does my headlight flicker only on one side?
It’s likely a bad bulb or loose ground connection. Swap bulbs side-to-side to isolate the issue, then check the ground bolt for corrosion.


