Even after putting in brand-new bulbs, have you ever noticed your headlights still look disappointingly dim? You’re not the only one asking, “Why are my headlights so dim even with new bulbs?” It’s a question I hear from car owners all the time, and it can be frustrating when you expect brighter lights but end up squinting at the road instead. The truth is, dim headlights usually point to issues beyond just the bulbs—things like cloudy headlight lenses, corroded wiring, poor ground connections, or even a weak alternator.
And while it might seem like just an annoyance, driving with dim headlights is a serious safety concern, especially at night or in bad weather. The good news is, there are proven ways to diagnose and fix the problem without wasting money on parts you don’t need. I’ll share the real reasons headlights stay dull and how you can bring them back to full brightness.

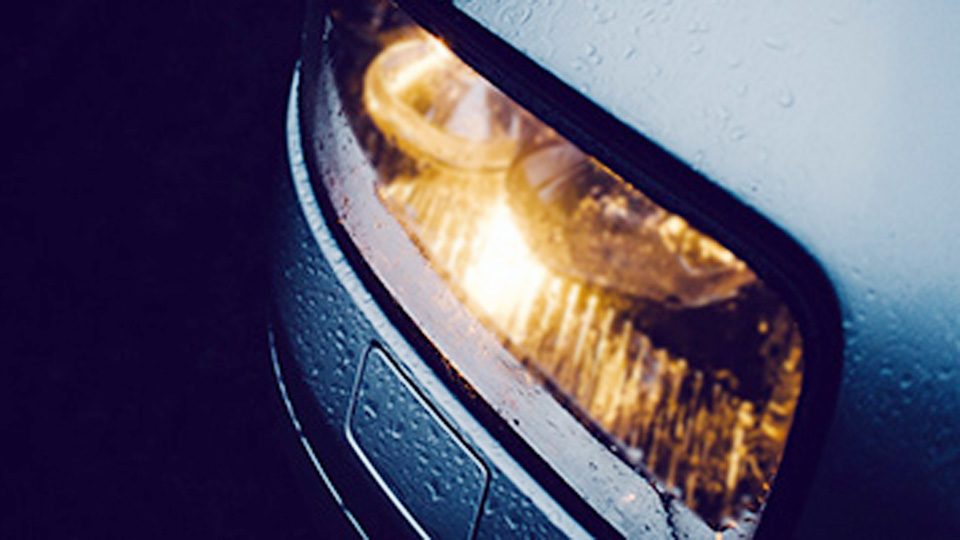
Image by 1aauto
Understanding Headlight Performance
Headlights are your eyes on the road at night, and when they’re dim, it’s like driving with one eye closed. New bulbs should deliver bright, focused light, but several factors can sabotage their performance. Think of your headlight system as a team: the bulb is the star player, but the wiring, lens, and housing all need to pull their weight.
If one part’s slacking, the whole system suffers. This is especially true for older cars or those driven in harsh U.S. climates—think Midwest winters or Arizona summers. Let’s break down the most common culprits and how to tackle them.
Cloudy or Yellowed Headlight Lenses
How It Works
Your headlight lenses are made of polycarbonate plastic, which is tough but not invincible. Over time, UV rays, road grime, and weather oxidize the lens surface, turning it cloudy or yellow. This blocks light from your new bulbs, making them seem dimmer than they are. It’s like trying to shine a flashlight through a foggy window.
Why It Matters
A cloudy lens doesn’t just reduce brightness; it scatters light, creating glare for other drivers and reducing your visibility. In the U.S., where night driving is common on long highways or poorly lit rural roads, this can be a safety hazard. I’ve seen friends struggle to spot deer or road signs because their lenses were too hazy.
When to Fix It
Check your lenses in daylight. If they look foggy, yellow, or have a rough texture, it’s time to act. This is one of the easiest and cheapest fixes for dim headlights, and you can do it in your driveway.
Step-by-Step Fix: Restoring Headlight Lenses
Here’s how I’ve restored cloudy lenses on my old Chevy and helped buddies with their cars:
Gather Supplies: You’ll need a headlight restoration kit (3M or Meguiar’s are solid choices, around $20), masking tape, microfiber cloths, and water. Kits include sandpaper, polishing compound, and sealant.
Prep the Area: Tape off the paint around the headlights to avoid scratches. Clean the lens with soap and water to remove dirt.
Sand the Lens: Use the kit’s wet sandpaper (start with coarser grits, like 800, then move to finer, like 2000). Sand in straight lines, not circles, to avoid swirl marks. Keep the lens wet to prevent damage.
Polish: Apply the polishing compound with a cloth or the kit’s pad. Work it in until the lens looks clear. This takes elbow grease—think of it as a workout.
Seal: Apply the UV sealant to protect the lens from future oxidation. Some kits include a spray; others require wiping it on.
Test: Turn on your headlights at dusk to check the difference. You should see a brighter, more focused beam.
Pro Tip: If the inside of the lens is cloudy (rare but possible), you’ll need to replace the headlight assembly, as internal haze can’t be polished out.
Pros and Cons
Pros: Affordable, DIY-friendly, and instantly improves light output. Most kits last for years if sealed properly.
Cons: Time-consuming (about an hour per headlight). Results vary based on lens condition, and severe damage may require replacement.
Electrical Issues: Wiring and Voltage Problems
How It Works
Your headlights rely on your car’s electrical system to deliver consistent voltage. New bulbs need about 12-14 volts to shine at full strength. Corroded wires, loose connections, or a weak alternator can reduce voltage, making even the brightest bulbs look dim. It’s like trying to power a spotlight with a dying battery.
Why It Matters
Electrical issues don’t just dim your lights; they can signal bigger problems, like a failing alternator or battery. In the U.S., where long commutes are common, a weak electrical system can leave you stranded. I once helped a neighbor whose Ford F-150 had dim headlights due to a corroded ground wire—fixing it saved him from a dead battery on a road trip.
When to Fix It
If your headlights flicker, dim when you rev the engine, or are uneven (one brighter than the other), it’s likely an electrical issue. Check this before buying expensive bulbs.
Step-by-Step Fix: Checking Electrical Connections
Here’s how I diagnose and fix electrical issues:
Test Voltage: Use a multimeter (about $15 at auto stores) to check voltage at the headlight connector. With the car running, you should see 13.5-14.5 volts. Less than 12 volts means trouble.
Inspect Wiring: Pop the hood and check the headlight wiring harness for corrosion, frayed wires, or loose plugs. Look for green or white crusty buildup.
Clean Connections: Disconnect the battery, then use a wire brush and electrical contact cleaner ($10) to scrub corrosion from connectors and grounds. The ground wire is usually bolted to the chassis near the headlight.
Test Again: Reconnect everything and test voltage. If it’s still low, your alternator or battery might be weak—take it to a mechanic for a load test.
Replace Damaged Wires: If wires are frayed, replace the harness (OEM parts are best, $20-$50). This is trickier, so watch a YouTube tutorial for your car model.
Warning: Always disconnect the battery before working on electrical components to avoid shocks or short circuits.
Pros and Cons
- Pros: Fixes are often cheap (cleaning is nearly free). Improves overall electrical reliability.
- Cons: Requires basic tools and confidence with electrical work. Severe issues may need professional help.
Incorrect Bulb Type or Poor-Quality Bulbs
How It Works
Not all bulbs are created equal. Even new bulbs can be dim if they’re the wrong type for your car or low quality. Halogen, HID, and LED bulbs have different brightness levels (measured in lumens) and color temperatures (measured in Kelvin). A mismatched bulb or a cheap knockoff won’t deliver the light you expect.
Why It Matters
Using the wrong bulb can damage your headlight system or reduce visibility. For example, installing LEDs in a halogen housing scatters light, creating glare instead of a focused beam. I learned this the hard way when I tried cheap LEDs in my old Civic—oncoming drivers flashed me constantly because the light was all over the place.
When to Fix It
If you replaced bulbs but didn’t check your car’s manual for the correct type (e.g., H7, 9005), or if you bought bargain-bin bulbs, this could be the issue. Check your bulb type and brand.
Choosing the Right Bulbs
Here’s a quick guide to picking bulbs, based on my experience:
| Bulb Type | Brightness (Lumens) | Lifespan | Cost | Best For |
|---|---|---|---|---|
| Halogen | 1,000-2,000 | 500-1,000 hrs | $10-$30 | Budget-conscious drivers, OEM replacements |
| HID (Xenon) | 3,000-5,000 | 2,000-3,000 hrs | $50-$100 | High-performance, luxury cars |
| LED | 2,000-8,000 | 10,000+ hrs | $50-$150 | Longevity, bright white light |
Steps to Fix:
Check Your Manual: Find the correct bulb size (e.g., H11, 9006) in your owner’s manual or on the old bulb.
Buy Quality Brands: Stick to trusted brands like Philips, Sylvania, or Osram. Avoid no-name bulbs from online marketplaces.
Install Correctly: Ensure the bulb is seated properly in the housing. For LEDs, check if your car needs a resistor kit to prevent flickering.
Test Beam Pattern: Park facing a wall at night. The beam should be even and focused, not scattered or dim.
Pros and Cons
- Pros: High-quality bulbs instantly boost brightness. LEDs and HIDs last longer.
- Cons: LEDs and HIDs are pricier and may require professional installation or retrofitting.
Misaligned Headlights
How It Works
If your headlights are pointing too low, too high, or off to the side, they won’t illuminate the road properly, making new bulbs seem dim. Misalignment happens from bumps, accidents, or even replacing bulbs without re-aiming. Your car’s headlight adjusters (small screws on the housing) control the beam angle.
Why It Matters
Misaligned headlights reduce visibility and can blind other drivers. On U.S. roads, where you might be navigating winding backroads or busy interstates, proper aim is critical. I once fixed a friend’s Mustang where one headlight was aimed at the ground—new bulbs didn’t help until we adjusted it.
When to Fix It
If your light pattern is uneven, too low, or blinding oncoming traffic, it’s time to adjust. Test by parking 25 feet from a wall at night; the beam cutoff should be about 2-3 feet off the ground.
Step-by-Step Fix: Adjusting Headlights
- Find a Level Surface: Park on flat ground facing a wall or garage door.
- Mark the Wall: Measure the height of your headlight centers and mark that height on the wall with tape. Mark the center of each headlight vertically.
- Locate Adjusters: Check your manual for adjuster screw locations (usually on top or behind the headlight).
- Adjust: Use a screwdriver to turn the screws, aiming the beam so the cutoff hits just below the horizontal tape line and aligns with the vertical marks.
- Test Drive: Drive at night to ensure the beam lights the road ahead without blinding others.
Warning: Over-adjusting can make lights too high, causing glare. Adjust in small increments.
Pros and Cons
- Pros: Free and quick (15 minutes). Dramatically improves light spread.
- Cons: Requires precision and patience. Some cars need professional alignment.
Dirty or Damaged Headlight Housing
How It Works
The reflective surface inside your headlight housing focuses the bulb’s light into a beam. If it’s dirty, rusted, or damaged, it scatters light, reducing brightness. Moisture or debris inside the housing is a common issue in humid or rainy U.S. regions.
Why It Matters
A damaged housing doesn’t just dim your lights; it can let water in, shorting out bulbs or wiring. I helped a buddy with a Jeep Wrangler whose headlights were dim because the housing was fogged up from a cracked seal—fixing it restored full brightness.
When to Fix It
If you see condensation, haze, or dirt inside the housing, or if the reflective surface looks dull or peeling, it’s time to clean or replace it.
Step-by-Step Fix: Cleaning or Replacing Housing
- Inspect: Remove the bulb (consult your manual) and check for moisture or damage inside the housing.
- Clean: If dirty, use a microfiber cloth and isopropyl alcohol to wipe the interior. Dry thoroughly.
- Check Seals: Look for cracked gaskets or seals. Replace with OEM seals ($5-$15) if needed.
- Replace if Damaged: If the reflective surface is peeling, replace the housing (aftermarket units cost $50-$200). Watch a YouTube guide for your car model.
- Test: Reinstall the bulb and test for improved brightness.
Pros and Cons
- Pros: Cleaning is cheap and quick. New housing restores like-new performance.
- Cons: Replacement is pricey and labor-intensive. Some cars require bumper removal.
Upgrading Your Headlights for Better Performance
How It Works
Sometimes, new bulbs aren’t enough if your car’s headlight system is outdated. Upgrading to LED or HID kits, or even aftermarket projector housings, can boost brightness and efficiency. Modern systems deliver more lumens and better beam patterns.
Why It Matters
For enthusiasts or drivers in rural areas with little street lighting, upgrading headlights can transform night driving. I upgraded my Tacoma’s halogens to LEDs, and the difference was like going from a candle to a spotlight.
When to Upgrade
If your lenses, wiring, and housing are in good shape but the light is still underwhelming, consider an upgrade. Check local laws—some U.S. states have restrictions on aftermarket lighting.
Upgrade Options
| Upgrade | Cost | Brightness Boost | Installation Difficulty | Best For |
|---|---|---|---|---|
| LED Conversion Kit | $50-$150 | 2x-4x halogen | Moderate (may need resistors) | Budget upgrades, modern look |
| HID Conversion Kit | $100-$200 | 3x-5x halogen | Hard (ballast installation) | Maximum brightness |
| Projector Housing | $200-$500 | Varies | Hard (retrofit skills needed) | Precise beam control |
Steps to Upgrade:
- Research Compatibility: Ensure the kit matches your car’s bulb size and electrical system.
- Install: Follow the kit’s instructions. LEDs are plug-and-play; HIDs need ballasts wired in.
- Aim Headlights: Re-align after installation to avoid glare.
- Test: Check for flickering or error codes. Resistors or CANbus adapters ($10-$30) may be needed for LEDs.
Pros and Cons
- Pros: Massive brightness boost, longer bulb life, modern aesthetics.
- Cons: High upfront cost, potential legal issues, and complex installation for some kits.
Maintenance Tips to Keep Headlights Bright
Keeping your headlights in top shape prevents dimness from creeping back. Here’s what I do for my cars and recommend to friends:
- Clean Lenses Monthly: Use a mild car wash soap and a microfiber cloth to remove grime. Avoid abrasive cleaners.
- Check Alignment Yearly: Roads in the U.S. are rough—potholes and bumps can knock headlights out of alignment.
- Inspect Wiring: Look for corrosion every oil change. A quick glance can catch issues early.
- Use Quality Bulbs: Spend a bit more on trusted brands to avoid premature dimming.
- Seal Housings: Apply silicone sealant around housing edges if you live in wet climates like the Pacific Northwest.
Conclusion
Dim headlights, even with new bulbs, are a common headache, but they’re fixable with a bit of know-how and elbow grease. Whether it’s cloudy lenses, electrical gremlins, or mismatched bulbs, you’ve now got a roadmap to diagnose and solve the problem. I’ve walked through these fixes on my own cars and helped friends get their lights shining bright again, so I know they work.
Start with the simplest fixes—like cleaning lenses or checking connections—before diving into upgrades or replacements. Safe night driving is worth the effort, especially on those dark, winding U.S. roads.
Keep a spare bulb and a small toolkit in your trunk for emergencies—you never know when you’ll need them.
FAQ
Why do my headlights look dim only on one side?
This usually points to an electrical issue, like a corroded connector or weak ground on one headlight. Check the wiring and clean connections. If that doesn’t work, the bulb might be defective—swap it with the other side to test.
Can I use LED bulbs in my halogen headlight housing?
Yes, but you need a compatible LED conversion kit. Without proper retrofitting, LEDs can scatter light and cause glare. Check your car’s manual and local laws, as some states regulate aftermarket LEDs.
How often should I replace my headlight bulbs?
Halogens last about 500-1,000 hours, HIDs 2,000-3,000 hours, and LEDs 10,000+ hours. For daily drivers, check halogens yearly, HIDs every 2-3 years, and LEDs rarely need replacing. Replace in pairs for even brightness.
Why do my headlights dim when I turn on the AC or heater?
This suggests your electrical system is struggling—likely a weak alternator or battery. Test voltage at the headlights with accessories on. If it drops below 12 volts, have a mechanic check your charging system.
Is it worth upgrading to projector headlights?
Projectors offer a sharper, more focused beam, ideal for night driving or performance cars. They’re pricier and harder to install but worth it if you drive a lot at night or want a premium look.


