I’ve spent countless evenings in my garage, wrench in hand, swapping out headlights or tweaking my car’s lighting setup to get that perfect beam for late-night drives. One question that’s popped up from buddies and fellow car enthusiasts is: Why are the back surfaces of automobile headlights curved? It’s not just a quirky design choice—there’s real engineering behind it, and it’s something every DIY mechanic, car owner, or enthusiast should understand.
Whether you’re upgrading your ride, troubleshooting a dim beam, or just curious about how your headlights work, knowing the purpose of that curved back surface can make you a smarter driver and mechanic.
The curved back of a headlight, often referred to in automotive circles as part of the reflector or housing, is designed to focus and direct light efficiently. It’s a critical piece of the puzzle that ensures your headlights illuminate the road ahead without blinding oncoming drivers. Let’s dive into the details, from the science of the curve to practical tips for maintaining or upgrading your headlights, tailored for US drivers tackling everything from city streets to rural backroads.

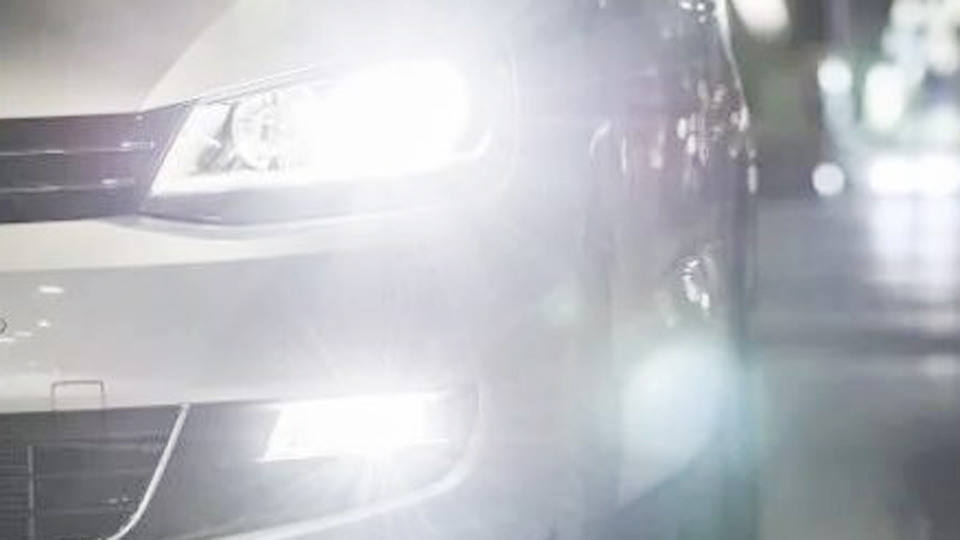
Image by magazine.northeast
The Science Behind Curved Headlight Reflectors
Headlights aren’t just bulbs—they’re a system. The curved back surface, typically a parabolic or ellipsoid reflector, is the unsung hero. When I first popped open a headlight assembly to replace a burnt-out bulb, I noticed the shiny, curved surface behind it. It’s not just for looks. That curve is engineered to capture the light emitted by the bulb and shape it into a focused beam.
The shape is usually parabolic, meaning it’s designed to reflect light rays from the bulb (placed at the focal point) into a near-parallel beam. This ensures the light travels farther and covers more of the road. Think of it like a flashlight: without a reflector, the light scatters everywhere, wasting energy. With a parabolic reflector, you get a tight, powerful beam. For US drivers, this is crucial on long highways or dark rural roads where visibility can mean the difference between spotting a deer or not.
Why It Matters
A properly curved reflector maximizes light output, which directly impacts safety. If the reflector’s shape is off or damaged, you’ll get weak, scattered light, reducing visibility. I’ve seen this firsthand when a friend’s old pickup had a foggy headlight—replacing it with a new assembly made night driving feel like daytime. The curve also helps meet strict US regulations, like those set by the Department of Transportation, ensuring your headlights don’t dazzle other drivers.
When to Check or Fix It
Inspect your reflectors if your headlights seem dim, even with new bulbs, or if the beam pattern looks uneven. Cracks, cloudiness, or corrosion on the reflector can ruin its ability to focus light. If you’re a DIYer, check the reflector when replacing bulbs—it’s a good time to clean or assess damage.
Types of Headlight Reflectors and Their Curves
Not all headlight reflectors are created equal. Over the years, I’ve worked on everything from classic muscle cars to modern SUVs, and the reflector designs vary. Here’s a breakdown of the main types you’ll encounter, especially in US-market vehicles.
Parabolic Reflectors
These are the most common in older and budget-friendly cars. The parabolic shape is simple but effective, focusing light into a broad, even beam. You’ll find these in vehicles like the Ford F-150 (pre-2015 models) or older Honda Civics. They’re great for general driving but can struggle with precision for high-speed or off-road conditions.
Ellipsoid Reflectors
Newer vehicles, like many BMWs or Toyotas from the last decade, often use ellipsoid reflectors in projector-style headlights. These have a tighter, more complex curve that works with a lens to create a sharper, more controlled beam. I swapped out a halogen projector for an LED upgrade on my cousin’s 2018 Camry, and the difference was night and day—pun intended.
Freeform Reflectors
Some modern cars, especially luxury models like Audis or newer Mustangs, use freeform reflectors. These have multiple curved surfaces tailored to specific beam patterns, like low beams, high beams, or even adaptive lighting. They’re trickier to maintain but offer incredible performance for diverse US driving conditions, from snowy Midwest winters to foggy coastal roads.
Pros and Cons of Reflector Types
| Type | Pros | Cons |
|---|---|---|
| Parabolic | Affordable, durable, easy to replace, good for general use | Less precise, can cause glare if misaligned |
| Ellipsoid (Projector) | Sharp beam, less glare, ideal for LED/HID upgrades | More expensive, complex to repair, lens can fog |
| Freeform | Highly customizable, excellent for adaptive lighting, premium performance | Costly, harder to source replacements, sensitive to damage |
When to Upgrade
If you’re restoring a classic car or upgrading a daily driver, consider switching to projector-style headlights with ellipsoid reflectors for better performance. For example, retrofitting a 90s Mustang with aftermarket projectors can modernize the lighting without losing that retro vibe. Just make sure the upgrade complies with local laws—some states are strict about aftermarket mods.
How Reflector Curves Affect Beam Patterns
The curve of the reflector doesn’t just throw light forward; it shapes the beam pattern to suit different driving needs. I learned this the hard way when I installed a cheap aftermarket headlight on my old Jeep. The beam was all over the place—too much light upward, not enough on the road. Here’s how the curve impacts what you see.
Low Beam Patterns
Low beams are designed with a sharp cutoff to avoid blinding oncoming traffic. The reflector’s curve ensures light stays below a certain height, focusing on the road 50-100 feet ahead. This is critical in urban areas or on busy US interstates where glare can cause accidents. If your low beams seem too dim or scatter upward, the reflector might be misaligned or degraded.
High Beam Patterns
High beams rely on the reflector to project light farther, often 200-300 feet, for open roads. The parabolic curve is key here, ensuring light reaches distant obstacles. I’ve driven through rural Texas at night, and a good high beam setup saved me from a few close calls with wildlife. If your high beams feel weak, check for reflector damage or consider an LED upgrade for better output.
Adaptive and Matrix Lighting
Some newer vehicles use complex reflector curves to support adaptive lighting, which adjusts the beam based on speed, steering, or weather. For example, my friend’s 2023 Audi Q5 has headlights that pivot with the steering wheel, thanks to intricate freeform reflectors. These are rare in budget cars but becoming standard in premium models.
Fixing Beam Issues
If your beam pattern is off—say, it’s too narrow or scatters light everywhere—start by checking the reflector. Dirt or corrosion can disrupt the curve’s effectiveness. Clean it with a soft cloth and isopropyl alcohol, but avoid abrasive cleaners that can scratch the surface. If the reflector is cracked, replace the entire assembly, as patching rarely restores full performance.
Maintaining Your Headlight Reflectors
I’ve seen too many cars with dim headlights because owners ignored basic maintenance. The reflector’s curve is only as good as its condition. Here’s how to keep it in top shape, based on my years of tinkering.
Cleaning the Reflector
Dust, bugs, or moisture can dull the reflector’s surface. When I restored a 2005 Silverado, the headlights were hazy from years of grime. Here’s a quick cleaning guide:
Remove the Assembly: Pop the hood and unplug the headlight. Most US cars use clips or bolts to secure the assembly—check your owner’s manual.
Disassemble Carefully: Remove the bulb (note its position) and lens if possible. Some assemblies are sealed, so you may need to work through the bulb socket.
Clean Gently: Use a microfiber cloth and isopropyl alcohol to wipe the reflector. For stubborn grime, try a mild dish soap solution, but rinse thoroughly.
Dry Completely: Moisture is the enemy. Use a hairdryer on low or let it air-dry to prevent fogging.
Reassemble and Test: Ensure everything’s secure, then test the beam pattern at night against a wall.
Warning: Never use abrasive pads or harsh chemicals like acetone—they’ll ruin the reflector’s coating.
Preventing Reflector Damage
US climates, from humid Florida summers to icy Minnesota winters, can wreak havoc on headlights. Here’s how to protect them:
Seal the Assembly: Check for cracks or loose seals that let water in. Use silicone sealant for minor gaps, but replace heavily damaged units.
Park Smart: Avoid parking under direct sunlight for long periods—UV rays can degrade reflectors over time.
Use Quality Bulbs: Cheap bulbs can overheat, warping the reflector. Stick to reputable brands like Philips or Sylvania.
When to Replace
If the reflector is cracked, faded, or corroded, it’s time for a new assembly. I once tried polishing a faded reflector on a 2010 Civic, but the beam was still weak. Replacement assemblies for popular US models like the F-150 or Accord cost $50-$200 online, and swapping them is a 30-minute job for most DIYers.
Upgrading Headlights for Better Performance
If you’re a car enthusiast like me, you’ve probably thought about upgrading your headlights. The curved reflector plays a big role in how well upgrades perform. Here’s what I’ve learned from upgrading my own vehicles and helping friends.
Halogen to LED Conversion
LEDs are brighter and more efficient than halogens, but they need a compatible reflector. I upgraded my 2015 Tacoma’s headlights to LEDs, and the parabolic reflector worked well, but the beam was slightly off until I adjusted the housing. Use plug-and-play LED kits designed for your car’s reflector type to avoid glare issues.
HID (Xenon) Upgrades
High-Intensity Discharge (HID) bulbs are another option, especially for projector headlights with ellipsoid reflectors. They’re brighter than halogens but require a ballast, which can complicate installation. I helped a buddy install HIDs on his 2017 Charger, and the crisp beam transformed his night drives. Just ensure the reflector is in good shape—HIDs amplify any flaws.
Aftermarket Assemblies
For a full upgrade, consider aftermarket headlight assemblies with built-in projectors or freeform reflectors. Brands like Morimoto or Anzo offer kits for popular US models like Jeeps, Mustangs, or Silverados. These can cost $200-$600 but deliver modern performance and style. Always check reviews to avoid cheap knockoffs with poor reflector quality.
Installation Tips
Test Fit First: Before finalizing the install, connect the new headlights and check the beam pattern against a wall.
Adjust Properly: Most headlights have adjustment screws for vertical and horizontal alignment. Aim low beams about 2-3 feet below the bulb height at 25 feet away.
Check Legality: Some states, like California, have strict rules on aftermarket headlights. Verify compliance to avoid tickets.
Warning: Improperly aimed headlights can blind other drivers. Always double-check alignment after upgrades.
Common Headlight Issues and Reflector-Related Fixes
Over the years, I’ve tackled plenty of headlight problems, and many tie back to the reflector’s curve. Here are common issues US drivers face and how to fix them.
Dim or Weak Light Output
If your headlights feel dim, the reflector might be dirty, faded, or misaligned. Clean it first, as outlined above. If that doesn’t help, inspect for corrosion or UV damage. Replacing the assembly is often the only fix for severe fading, especially on older cars like 90s Camaros or Fords exposed to harsh sunlight.
Uneven Beam Patterns
An uneven beam—say, bright spots or dark patches—often means a damaged or misaligned reflector. I once fixed a 2012 Malibu with this issue by realigning the reflector housing, which had shifted after a minor fender bender. If realignment doesn’t work, replace the assembly.
Foggy or Cloudy Lenses
While not directly a reflector issue, a foggy lens scatters light, reducing the reflector’s effectiveness. Polishing kits (like 3M or Meguiar’s) can restore clarity for $20-$30. I used one on my sister’s 2008 CR-V, and it was like getting new headlights for cheap.
Flickering or Intermittent Light
Flickering is usually a bulb or wiring issue, but a loose reflector can cause it too. Check that the reflector is secure in the housing. I fixed a flickering headlight on a 2016 Ram by tightening a loose reflector clip—problem solved in 10 minutes.
Headlight Maintenance for US Driving Conditions
Driving conditions in the US vary wildly—think dusty Texas roads, snowy Michigan winters, or rainy Pacific Northwest highways. The reflector’s condition directly affects how well your headlights perform in these environments.
Dusty or Dry Climates
In places like Arizona or Nevada, dust can settle on reflectors, dulling their shine. Clean them every 6 months, especially if you drive on unpaved roads. A quick inspection during oil changes keeps things in check.
Snow and Ice
In colder states like Minnesota or Wisconsin, road salt and ice can corrode reflectors. Rinse your headlights with fresh water after snowy drives to prevent buildup. If you notice pitting, replace the assembly before it worsens.
Coastal or Humid Areas
Humidity in places like Florida or Louisiana can cause fogging inside the headlight. Check seals and use silica gel packets inside the assembly to absorb moisture—a trick I learned working on a friend’s 2014 Altima in Miami.
Choosing the Right Headlight Bulbs for Your Reflector
The reflector’s curve is designed for specific bulb types, so choosing the right one is key. Here’s a quick guide based on my experience.
Halogen Bulbs
Standard for most older US cars, halogens are affordable ($10-$30) and work well with parabolic reflectors. Brands like Sylvania SilverStar offer brighter output without overwhelming the reflector.
LED Bulbs
LEDs are great for efficiency and brightness but can cause glare if not matched to the reflector. Look for bulbs with a beam pattern similar to your stock halogens. I use Philips X-tremeUltinon LEDs in my Tacoma—pricey at $100, but worth it for the crisp light.
HID Bulbs
Best for projector headlights, HIDs need a precise reflector to avoid scattering. Kits cost $50-$150, and installation can be tricky, so consider professional help if you’re new to it.
Comparison Chart: Bulb Types
| Bulb Type | Brightness | Cost | Lifespan | Best Reflector |
|---|---|---|---|---|
| Halogen | Moderate | $10-$30 | 500-1,000 hrs | Parabolic |
| LED | High | $50-$150 | 10,000+ hrs | Ellipsoid/Projector |
| HID | Very High | $50-$200 | 2,000-3,000 hrs | Ellipsoid/Projector |
Conclusion
Understanding why the back surfaces of automobile headlights are curved isn’t just trivia—it’s practical knowledge that can make you a better driver and mechanic. That parabolic or ellipsoid curve is the backbone of your headlight’s performance, shaping light to keep you safe on US roads, whether you’re cruising a city street or tackling a dark highway.
From cleaning reflectors to upgrading to LEDs, these tips come from years of hands-on work in my garage and helping friends fix their rides. Next time you’re under the hood, take a moment to check your reflectors—it’s a small step that can make a big difference.
Always carry a spare bulb in your glovebox; you never know when a late-night drive might leave you in the dark.
FAQ
Why do my headlights seem dim even with new bulbs?
Dim headlights with new bulbs often point to a dirty or damaged reflector. Clean the reflector with isopropyl alcohol, and inspect for corrosion or fading. If the problem persists, replace the headlight assembly.
Can I use LED bulbs in any headlight reflector?
Not always. LED bulbs work best with projector or ellipsoid reflectors. In parabolic reflectors, they can cause glare unless designed to mimic halogen beam patterns. Check compatibility before buying.
How often should I clean my headlight reflectors?
Clean reflectors every 6-12 months, especially in dusty or salty environments. Regular cleaning prevents buildup that dulls the reflector’s ability to focus light.
Are aftermarket headlight assemblies worth it?
Quality aftermarket assemblies, like those from Morimoto, can improve performance and style. Avoid cheap knockoffs, as their reflectors often produce poor beam patterns. Check reviews and ensure compatibility with your car.
Why do my headlights fog up, and does it affect the reflector?
Fogging happens when seals fail, letting moisture in. It can reduce the reflector’s effectiveness by scattering light. Fix minor fogging with silica gel packets or replace the assembly if seals are broken.


